

At some point, when I was making my own hamburger buns and bagels, I decided to try out making my own bread. I wasn't really sure what would come of it, whether it would really be good enough to replace our weekly allotment of Arnold's Bread loaves or whether I could get the slices thin enough to slather on peanut butter and jelly. But, pleasantly, I was surprised.
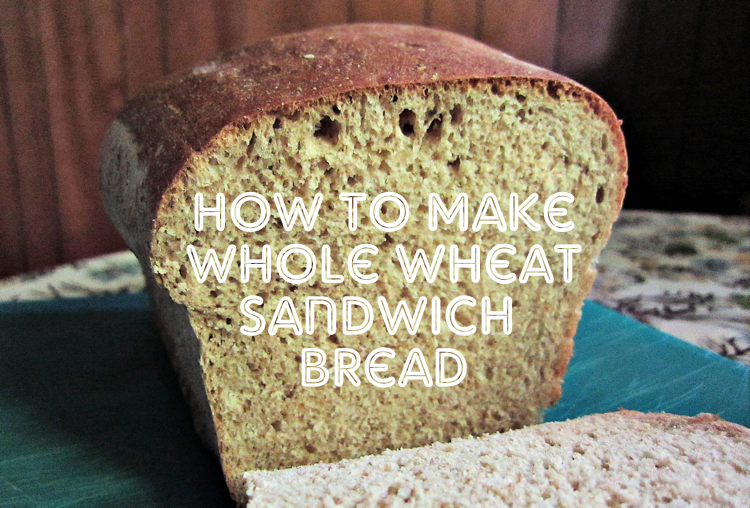
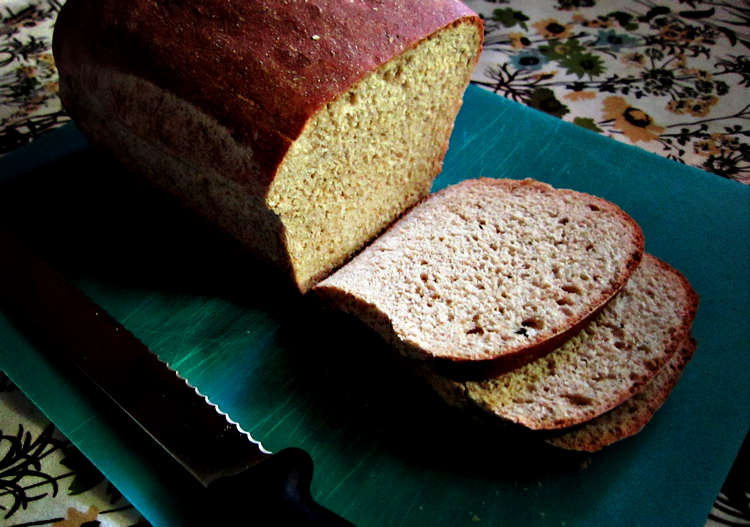
The loaf came out golden and crusty—even shaped like storebought bread. And once I sliced it, toasted it, topped it butter and jam, it was no different than the kind we kept in our pantry. Except that it was better—as evidenced by the fact that we actually enjoy having the heel of the loaf as morning toast. To boot, it's surprisingly cheap and super easy to make, thanks to my bread maker.
Needless to say, it's been months since I've bought a loaf of bread from the store. Instead, now my cart will have a bag of flour or a carton of yeast. And once or twice a week, you'll find me in the kitchen, pulling a new loaf of wheat bread, fresh from the oven.
Want to try your hand at making your own sandwich bread, too? Find my whole wheat bread recipe below, and then check out my post devoted to breadmaking tips and tricks that I've picked up along the way.

Recipe to Make Your Own Whole Wheat Sandwich Bread with a Bread Maker
Ingredients
⅝ cup warm-ish water
⅜ cup milk
1 egg
1½ tablespoons canola oil
1½ tablespoons honey
1½ teaspoons salt
1½ cups whole wheat flour
1½ cups bread flour (if you don't have bread flour, check out my breadmaking tips for an easy substitution)
2 teaspoons bread machine yeast
Instructions
- In your bread machine (mine is similar to this one), add ingredients from the water to the flours, in the order given in the recipe. (So, you'll add the water first and the bread flour last.)
- Once you've added the last of the flour, use a spoon to hollow out a little dent in the middle of the flour. Into this, add your yeast.
- Program your bread machine on the "Dough" cycle. Press Start.
- Let the bread machine mix the dough and go through the rising cycle. At the end, it will beep.
- Prep a loaf pan by spraying it with non-stick spray.
- Remove the ball of dough from the bread machine's pan, and put into the loaf pan. Press it down a bit so that it flattens to fit the shape of the dish.
- Put a cotton dish towel over the dish, and set in a warm place to rise for an hour. After an hour, it should have about doubled in size. (For an easy way to let your bread rise, read my breadmaking tips and tricks article.)
- Turn your oven on to bake at 350-degrees. Remove the dish towel from the dough, and let it bake in the oven for about 20 to 25 minutes, until golden.
- Remove from oven and let cool.
- Once cool, cut into slices. Store slices in a sealed bag or airtight container for up to a week. (You can also keep the loaf in the fridge.)
Recipe makes one medium-sized loaf of wheat bread.Related Posts
Homemade Breadmaking Tips & Tricks
Recipe for Making Homemade Bagels in a Bread Maker


Looks delicious:) Now I just need a bread machine!! ;)
ReplyDeleteGoing to ask for a bread machine for Christmas now!
ReplyDeleteThanks, ladies! I absolutely love having my bread machine; you can make so much in it and it's really not that hard at all!
ReplyDeleteOh, I'm so excited to try this! I love my bread machine and found a white bread recipe I like, but nothing for wheat.
ReplyDeleteLaura, let me know if you do try this recipe! I'd definitely recommend it because I have made it dozens and dozens of times and never been disappointed. Later today I'll be posting some tips and tricks that will help ensure that, as well!
ReplyDeleteYuuuum! You are making me so hungry! The bread is beautiful.
ReplyDeleteNicole, thanks! And I assure you, it tastes as good as it looks! If you can get your hands on a breadmaker, give it a try sometime!
ReplyDeleteHow would you adapt the recipe if you don't have a bread machine?
ReplyDeleteJeannie, unfortunately I have only made this using the bread machine, so I am not sure. However, I imagine you should be able to look something up online for how to adapt bread machine recipes for kneading by hand and play with that. If you do end up trying it without a bread machine, please let me know how you did it so that I can let any others who are without a breadmaker know! Thanks!
ReplyDeleteyummy and good for us too ! Ill have to dust off the ole bread machine now
ReplyDelete- KAT -
do you need to use a bread machine?
ReplyDeleteRebecca, you can definitely use this recipe if you do not have a breadmaker but I don't know exactly how you'd adapt it. However, I imagine you should be able to look something up online for how to adapt bread machine recipes for kneading by hand and play with that. If you do end up trying it without a bread machine, please let me know how you did it so that I can let any others who are without a breadmaker know! Thanks!
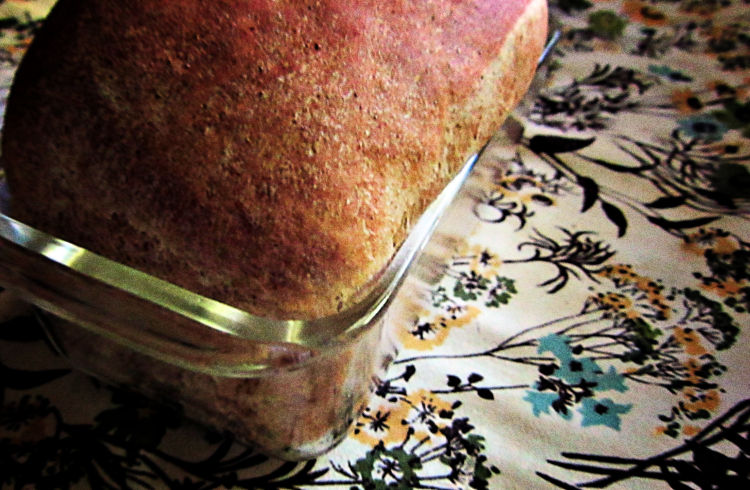
ReplyDeleteI just made this and wasn't sure if I should let it cool in the pan, or get it out of the pan and let it cool on the rack. Well, it came apart with the bottom sticking to the pan. We'll still eat it, just in chunks! I noticed your picture was with a glass loaf pan. Maybe I'll try that next time too.
ReplyDeleteBeckyjam, I'm sorry your loaf didn't hold together! I think the culprit might be that you did not coat the bottom of your pan well enough with cooking spray.
ReplyDeleteI do usually let my loaf cool in the pan (which, as you observed, is glass) for about an hour before I shake the loaf loose. (Turning it upside down and shaking it usually does the trick and it slips out without a problem.) Then I let it cool on a rack.
Hope that helps for the next time. It really is a great bread so I hope you don't give up on this recipe!
What is your reason for cooking your bread in the oven as opposed to letting the bread machine cook it?
ReplyDeleteCarrie, when I bake loaves in my machine they are misshapen from the paddle and there's a hole where dough rested on the paddle. There are other brands that are designed to prevent this, but I just find it easier (and more cost effective!) to bake it in the oven rather than buy a whole new machine!
ReplyDeleteI am a newbie at bread baking & have a question. I did every step as directed above, however, my bread did not rise much after I put it in the oven... in fact, it almost seemed as if it was lower after I baked it than when I first put it in. It seemed very dense & not done all of the way. (Before I put it in the oven, it was double in size as expected.) What did I do wrong? Thank you for any help. ;)
ReplyDeleteHmm. I don't think that's ever happened to me before, Bluebird. There are lots of variables in baking, so I am not sure exactly what it is. However my guess would be that either your oven got too hot (and killed the yeast so that it did not rise properly) or that maybe you needed to leave it in your oven longer. (When it's really cold here, sometimes I have to let it rise for an hour and a half; I usually just go by when it's gotten tall enough.) I'd advise you to try it again and make sure to only turn the oven on for one minute and then promptly turn it off before letting the dough rise in the heat. See if that solves it. If not, it could also be your yeast, if it's no longer "active." Let me know if you try it again and how it goes. I am happy to try to help you problem solve!
ReplyDeleteI absolutely LOVE this recipe. It has come out EVERY single time I have made it, even making some changes, like more whole wheat flour and less white. And I usually struggle SOOO much with making bread, I kind of had given up hope that I could do it successfully everytime. The tips like letting it rise in a warm oven and adding gluten to the regular flour have been so crucial for me to be successful here. Thank you so much for this new bread recipe and the confidence, I am so grateful!
ReplyDeleteI'm so pleased to hear that, Brooke! I'm glad my tips helped you figure it out because it is so wonderful to be able to have homemade bread! Thanks for letting me know that my recipe was helpful!
ReplyDelete