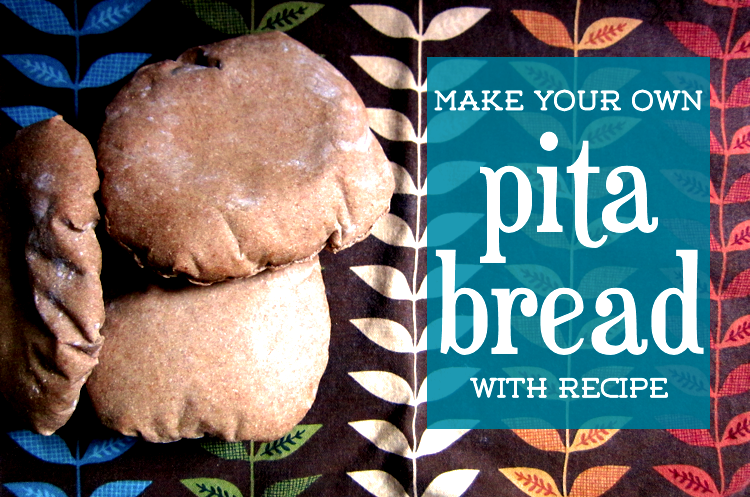
Homemade Whole Wheat Pita Bread Recipe


For some reason, making lunch in a homemade pita pocket just makes a sandwich feel a little fancier. I'm a firm believer that you can never go wrong with a sandwich, which is why I quickly added learning how to make pitas to my arsenal of bread-making.

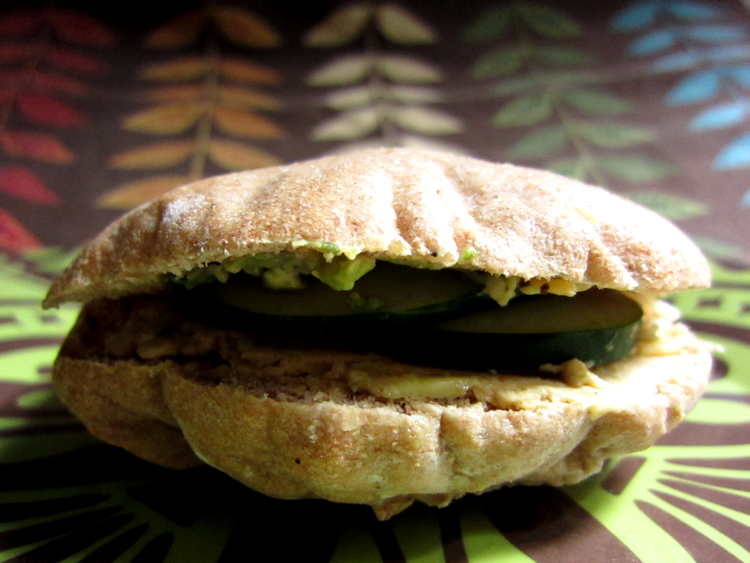
Making pitas feels a bit like a science experiment, because part of it involves watching the pitas puff up with steam in the oven and then pitching them into a brown-paper bag to cool. I don't exactly know why it works, but I know that it does work. And that's all that really matters when I'm smearing some homemade hummus and trimmings onto my freshly baked whole-wheat pita bread.

Like my other bread-making recipes (for making whole-wheat sandwich bread and bagels), this one involves using a bread machine, which I think is one of the most oft-used tools in my kitchen. I can't recommend getting one enough!


Homemade Whole Wheat Pita Bread Recipe
Ingredients
1⅛ cups warm water
1 tablespoon oil
1½ teaspoons sugar
1 teaspoon salt
3 cups whole wheat flour
1½ teaspoons bread machine yeast

Instructions
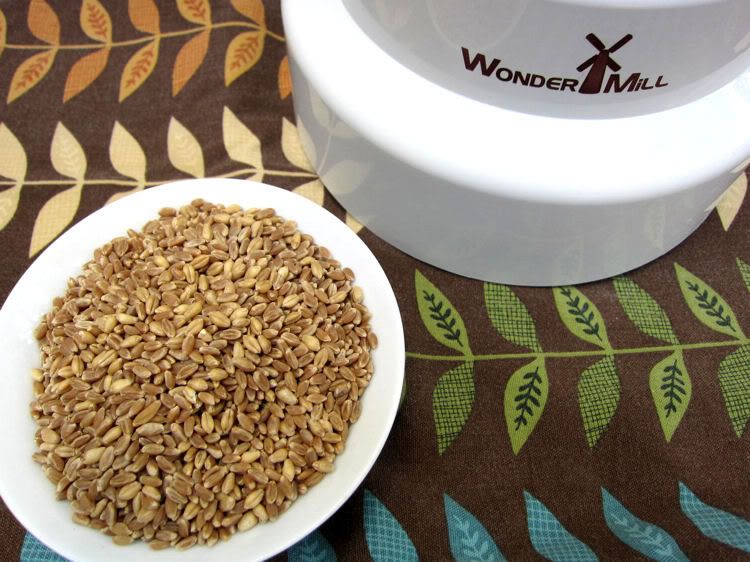
  1. I have been grinding my own fresh flour using the electric WonderMill Grain Mill. For fresh-ground flour, use 1 cup hard winter red wheat berries and 1 cup hard winter white wheat berries (shown below) and grind to a fine flour suitable for bread-making. (Note that two cups of grains will grind up to three cups of flour.)


  2. In your bread machine (mine is similar to this one), add ingredients from the water to the flour, in the order given in the recipe. (So, you'll add the water first and the wheat flour last.)
  3. Once you've added the last of the flour, use a spoon to hollow out a little dent in the middle of the flour. Into this, add your yeast.
  4. Program your bread machine on the "Dough" cycle. Press Start.
  5. Let the bread machine mix the dough and go through the rising cycle. At the end, it will beep.
  6. Remove the dough from the pan, and turn out onto lightly floured countertop, stretching into a log-shape (like that of a large hot dog) that's about 12 inches or so in length. Try to make the log the same thickness all the way around.
  7. Cut the log into 8 equal-sized slices. (Usually, I'll cut it in half, and then divide each of those sections in half and then each of those in half again.)
  8. Lightly flour one or two cookie sheets, and set aside.
  9. Lightly flour your countertop. Then use a rolling pin to flatten each slice into a 6- or 7-inch disk, being careful not to tear or crease the dough, as this will cause them not to "puff" during baking. After you roll out each piece of dough, place onto the cookie sheet.
  10. Once all pieces of dough are flattened and arranged on the cookie sheets, cover them completely with dish cloths or tea towels, and let the dough rise for about 45 minutes to an hour. (At this point they will look ever-so-slightly puffy. You'll be able to tell when you pull them from the cookie sheet and the surface will look like it's "cracking" a little.)
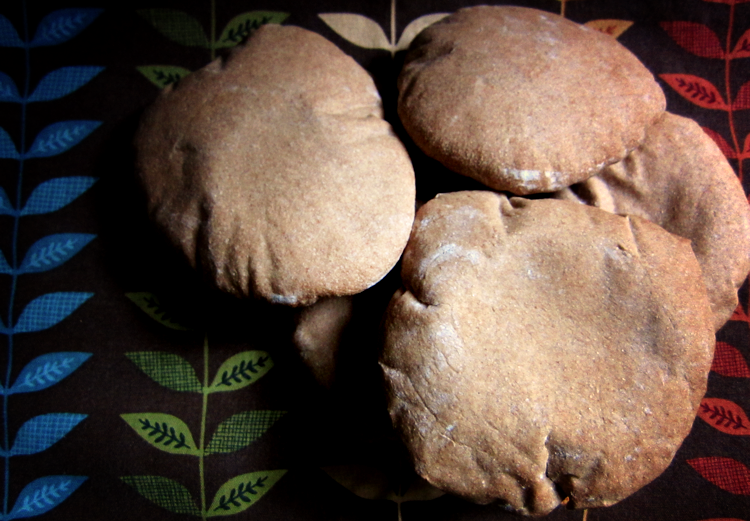
  11. Preheat your oven to 500 degrees. Place two or three pitas onto a wire cake or cooling rack, and then place in the oven. Bake them for 4 to 5 minutes, once they are puffed and the tops are starting to turn brown. (Note: I've found that the wire rack is essential to getting the pitas to "puff up." If you don't have a rack, you can try using cookie or baking sheets, but they don't guarantee as good of results as the wire rack, or placing them directly on your oven's rack. Just be careful not to get burned!)
  12. Once they've puffed up and the tops are slightly browned, remove from the oven, and place them immediately in a brown-paper bag. Close the top of the bag using a clip.
  13. Continue to bake the remaining pieces of dough and placing them in the brown-paper bag once baked.
  14. Let them sit in the bag for about 30 to 60 minutes, until the pitas are soft. Then you can remove and store in your fridge for several days or you can freeze them for one or two months. Store in plastic bags or other containers you can seal.
Then, enjoy!

 P.S. If you are new to this blog, thank you so much for stopping by! You can feel free to browse all my other posts about my journey toward a lifestyle of simplicity and DIY, as well as some of the ways my husband and I are learning to save money. I also write about my faith, my marriage and everything in between, which you can explore in the archives.

Related Posts
Homemade Hummus Recipe
Recipe to Make Your Own Bagels

READ FULL POST >>

Getting Inspired for Next Spring: Collecting Landscaping Ideas and Starting a Compost Bin!


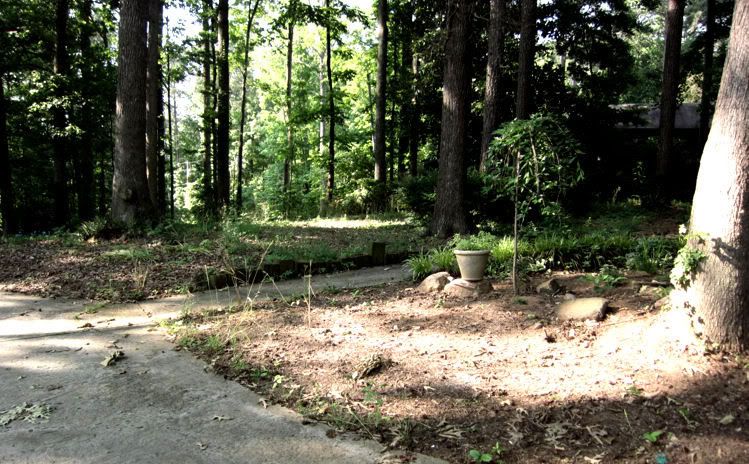
Inspired by my post the other week about what’s been sprouting up in my yard—and also notably about what hasn’t, since our yard is mostly leaves and weeds, as I attested to here—I’ve had an itch to learn more about natural gardening and landscaping so that next year, I can do something about the tangle of weeds and leaves that is our yard.

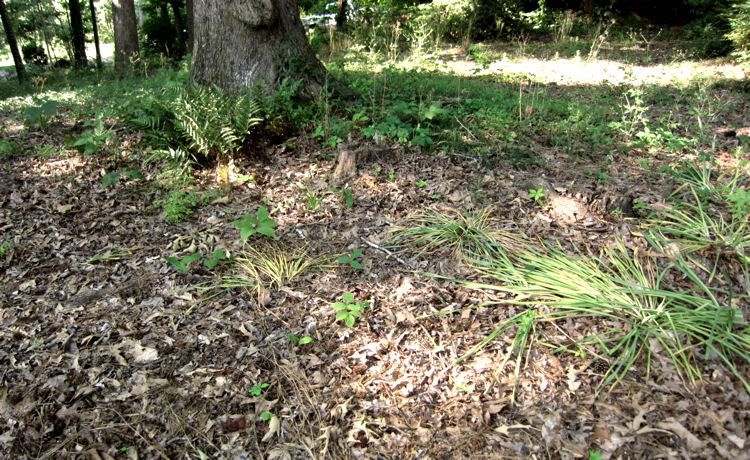
Exhibit A:


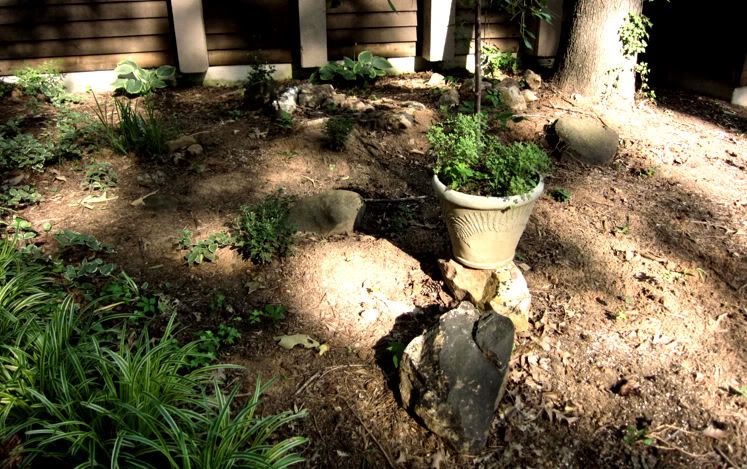
The thing is that our yard is pretty big and there’s nary a blade of turf grass on it; some spots of ornamental grass but no vast expanses like most yards. It’s also really shady, thanks to the huge number of trees that shade our house. (Though I’m not by any means complaining—that’s one of the things I love best about our lot! And they’ve proven to keep our house quite cool this summer!)

Exhibit B:


But the ample shade does pose its own challenges to landscaping a yard, so I turned to our trusty library and checked out a couple of books for some inspiration and ideas: Making the Most of Shade and Natural Landscaping. The thing that I like about both of these books is that they aren’t your typical garden-till-your-fingers-and-green-thumbs-fall-off sort. Instead, they are much more of a laissez-faire approach to gardening, following the lead of Mother Nature and her gardening techniques.

They talk about how to pick plants that thrive in shade, how to make the most of ground cover, how to create your own natural landscapes (like a meadow or a butterfly garden or a bird-attracting garden!!) into spots throughout your yard.

Well, that got me going! I started taking notes and looking around our yard, thinking of how things could be arranged and transplanted and pruned anew. I even dug up some of the daffodil bulbs that had sprouted in the oddest of places and replanted some for next spring in some more attractive locations in our yard that should also give them more sunlight, so I think they’ll last longer. (I noticed that this year, they petered out once the trees’ leaves overhead started bursting forth.)

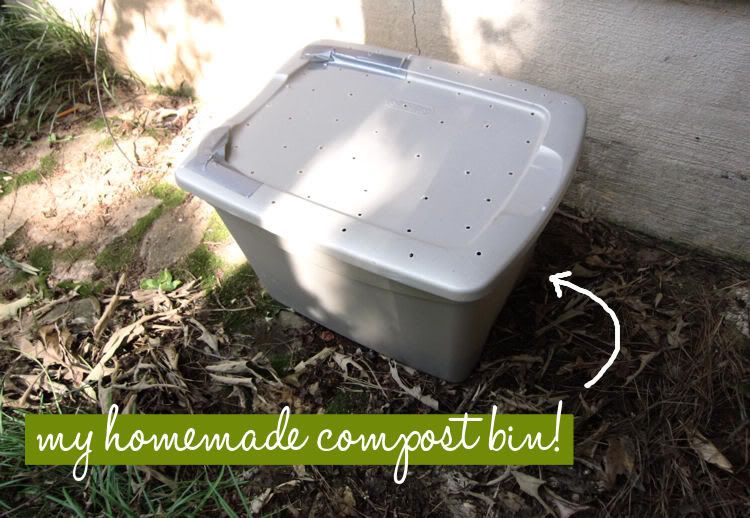
Of course none of this will happen very quickly, but it’s inspiration taking root. And part of making those become reality is that to do so, I’ll need plenty of healthy soil for any new plantings I’ll be adding. One book recommended using compost if you can find it, and that’s actually something I’ve been meaning to try, since I already store and bag our food waste scraps up separately anyway.


So, I did some research (sources here, here, and here) and created a super-easy compost bin that is now sitting behind our back deck. I’ve only just started adding stuff to it, but I’m hoping that with regular additions and maintenance (you have to turn or mix it every month or so) that I’ll have a decent amount of fresh soil for spring. At least enough to start work on transforming even the smallest corner of this woodland wilderness of ours!

Related Posts
More Exploring The Beauty in My Backyard, March Edition
Starting a Container Vegetable Garden
READ FULL POST >>

Evangelism Need Not Be Apologetics: Some Thoughts About Sharing Your Faith


e•van•ge•lism, noun: the preaching or promulgation (proclaiming) of the gospel
a•pol•o•get•ics, noun: the branch of theology concerned with the defense or proof of Christianity.

Even in the dictionary, these two words, "evangelism" and "apologetics," are different, are not the same thing.

And yet, I think that as Christians, we tend to melt the two together to be one, thinking that if we are going to “evangelize” then that means we have to have all of the answers about why God allows suffering and what going to hell means and how old the Earth is and whether King David really lived or why God does this or says that or what this or that really means.

Having all the answers to those kinds of questions falls into the "apologetics" category.  They're good questions and ones that many of us wrestle with, to be sure. But do we have to have the answers to them?

Too often, I think that we assume that if we're going to "proclaim the gospel" (meaning, "evangelize"), then we must. We think that to share the gospel, we have to be able to defend Scripture and pull verses up from memory for every discourse. We think that if we’re going to share the Good News, then we have to be able to do it in 60 seconds or less and start off with the question, “If you died today, where would you go?” and then explain it all in context of Revelation and the bowls and plagues and horsemen and scrolls.

It’s enough to make even the boldest and bravest of Christians shrink back from the task.

And yet, if we look back at those definitions, we’ll see that evangelism simply asks us to “proclaim the gospel.” It doesn’t say anything about scientific equations or archaeological digs or cosmic evidence. It doesn’t say anything about knowing Hebrew or the ability to open the Bible to the exact page you intended without looking.

They're not bad questions and it certainly doesn't hurt if you have studied those kinds of hard questions and know the Hebrew and Greek of the original texts. Of course it is helpful when we're sharing the gospel to know verses and know Jesus' words and able to share those legacies of our faith with the people we're talking to.

But must we know it all? Must we have it all figured out before we evangelize?

A pastor once told me that if we want to evangelize, we should focus less on all academic and theological and classroom stuff, and focus instead on Jesus, plain and simple. Focus on Jesus and how his good news has affected me. Tell people about how he has changed my life and how he has shown me his love and how he’s saved me time and time again.

Proclaiming the gospel can simply be us taking the time to strip down to the bare bones of our faith walk and share what we’ve experienced of Jesus, firsthand.

Because then we can’t use any excuses when it comes to being inadequate or untrained. I may not have all the answers, but I can share my own story. And maybe, that’s all that it takes…

Related Posts
The Truth About My Inadequacies: A Lesson from the Bible
My Testimony: Learning About God's Loyalty Firsthand
READ FULL POST >>

Six Chairs, A Vintage Buffet, Weed Whacker and More: My Parents Came to Visit

I have been in rearranging and redecorating mode around here lately. That’s because my parents came down to visit last week, bringing with them the last of the things I’d been storing at their house, an eight-hour drive away.

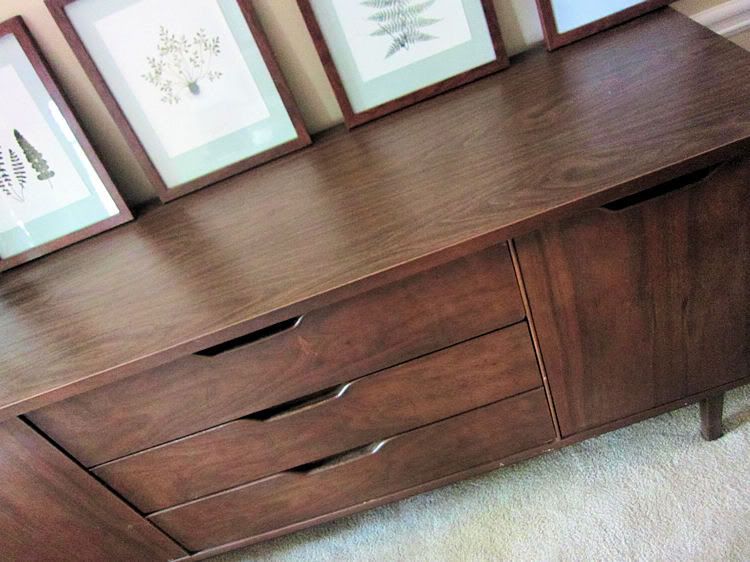
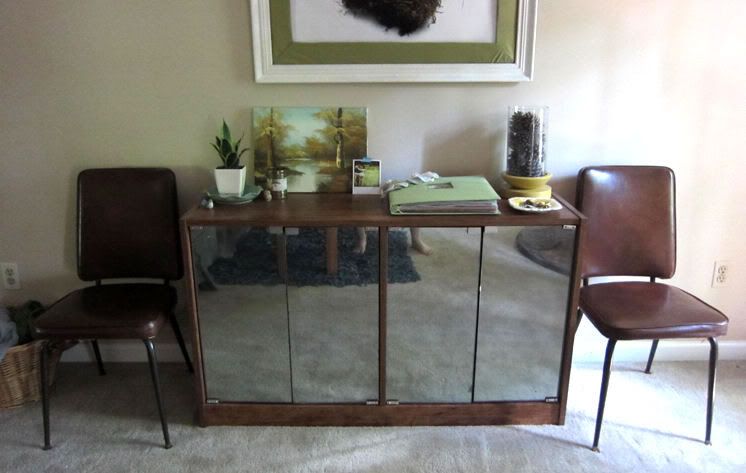
Things like a hand-me-down weed whacker (much-needed for our yard!), a vintage painting I’d nabbed at an antique mall for my first post-college apartment, a few miscellaneous chairs for easier entertaining in the library and living room, a curtain rod I have plans to paint. And, my favorite piece of furniture ever: a mid-century modern buffet.

Consequently, since they’ve left, my time has been filled with shuffling picture frames around, finding new places for plants, organizing the garage, learning how to use all the new-to-me tools they brought (a rug steamer! a steam mop! a weed whacker!) and experimenting with new places and spots for everything.

There are times when it can feel overwhelming, now that my to-do list of house projects has surged with all the new ideas that come along with the new things. But it’s also been really exciting, to see our house start to take more shape, for the gaps to start to fill in, and for my personality to shine through more and more as I hang more touches on the walls and around the rooms.

Nothing is quite finished yet, but here are some in-the-meantime sneak peeks:


This is my all-time, favorite piece of furniture. Right now it's pretty empty, but I just love having it around again! It's been almost 4 years since I left this buffet behind at my parents' house when I moved to Grand Rapids, Michigan!


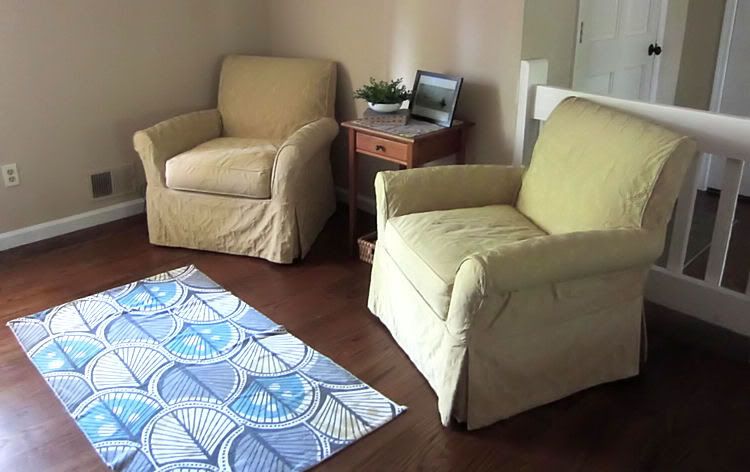
What was previously the home's formal dining room is now being treated as our library. (We bought a large pedestal table that sits in the kitchen where we do all of our eating.) Until we got these armchairs from my in-laws, this room was completely empty save for the bookshelves on the opposite wall. Now it's starting to feel like home and we're using this room a lot!


I plan on recovering these two side dining chairs. (Or maybe sewing some slip covers? I haven't decided yet.) But for now, they are much needed for anytime we want to seat more than 4 people around our kitchen table, since we only have 4 proper dining chairs and otherwise have to drag in our office chairs! I think they also look cute propped against this wall when we don't have the table extended.


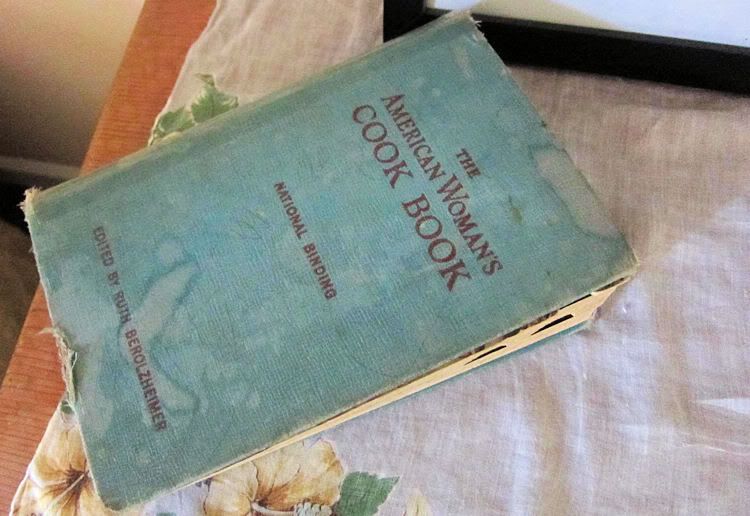
And they brought lots of vintage lovelies with them, like this age-worn cookbook that makes a great display piece and lots of vintage Christmas ornaments as well as some old picture frames and more!

Related Posts
My Secret Weapon to Decorating My House
What We've Done Around the House So Far
READ FULL POST >>

Exploring the Archives: August 2010 on Life Blessons


I'm still plugging away at manually creating a browser-friendly archives page for all my past blog posts, month by month. Here's a look at what was going on in my life, way back in August 2010. From adventures in the kitchen making homemade bagels and chicken stock to a really interesting book I read that looks at making marriages stronger from a scientific perspective, I hope you enjoy getting to take a little step back in time with me:

Archive Posts from August 2010

I'll share another post in a couple of weeks with the next installment of archives, but you can always jump ahead and browse all the posts in the archive.

Related Posts
Seeking Simplicity: Cutting Back Time Wasted Online

Resources to Stretch Your Online Shopping 
{ photo source }
READ FULL POST >>

Exploring the Beauty of My Backyard: June Edition


When we bought our house in November, it was the interior that sold us. (You can see a sneak-peek at what the house looked like when we first bought it here.) We loved that the outside was filled with tree after tree, but all the leaves had fallen and hidden the rest of the yard beneath a blanket of fallen foliage and pine needles.

So now that we are well into summer, it’s been like a secret garden to see what pops up, what has been lying beneath the surface unbeknownst to us, its new owners and admirers.

Back in February, I spent an afternoon exploring all the natural beauty that was hidden throughout my yard. And then in March, I shared an update of the new things that had sprung up.

It's now late into June, summer officially here, and consequently, time to pay the ole homestead a revisit.

Here are some of the new sites we've been pleasantly surprised to find spring up around our yard most recently:


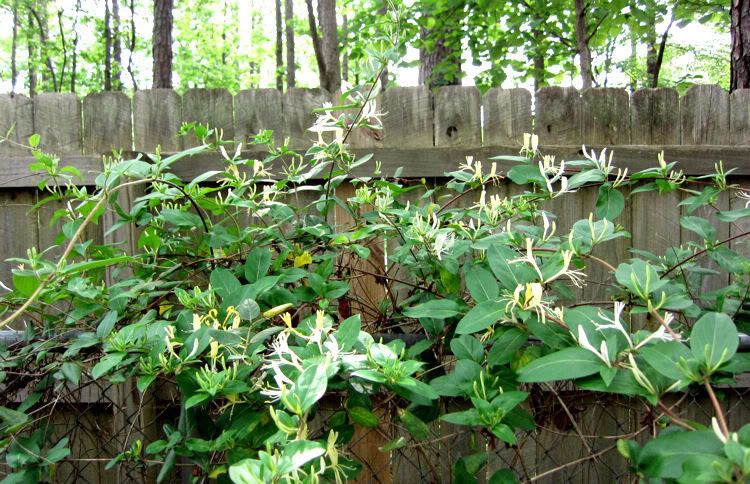
Cute little clumps of wildflowers have found their way into the yard, as well as some sweet-smelling honeysuckle, climbing over our back fence.


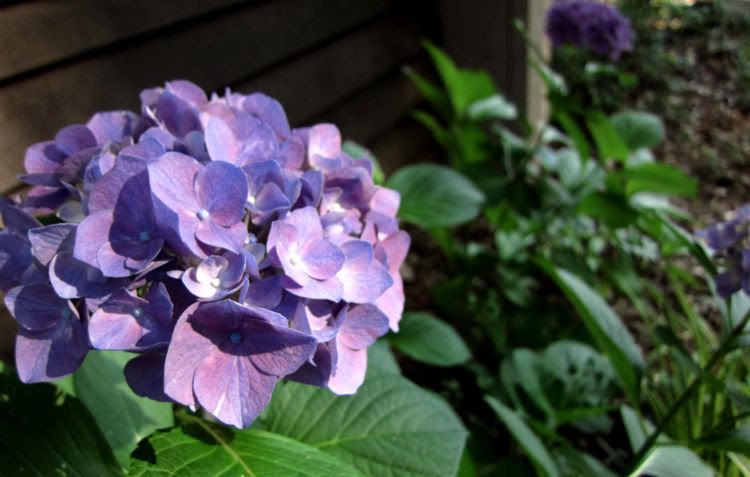
Imagine my surprise when hydrangeas popped out beneath one of our windows? Hydrangeas! I love them and they've been the highlight of this secret garden of mine!


What I'd earlier suspected to be a rose bush turned out to be correct, although it only gave out a couple of blossoms. It's in a pretty shady part of the yard, so my mom thinks perhaps it isn't getting enough sun to put out more blooms. I might try transplanting it...


The last of our azaleas. We had a lot come into bloom in early spring, but these are the last couple that haven't gone brown yet.


Money may not grow on trees, but money plants do grow in our yard! That's what these funny little plants are called, because when the seed pods are in the sun, the seeds look like little coins inside a change purse. How cute, huh? And, the flowers that came before the change-purse-like seed pods were the pretty purple numbers featured in this post.


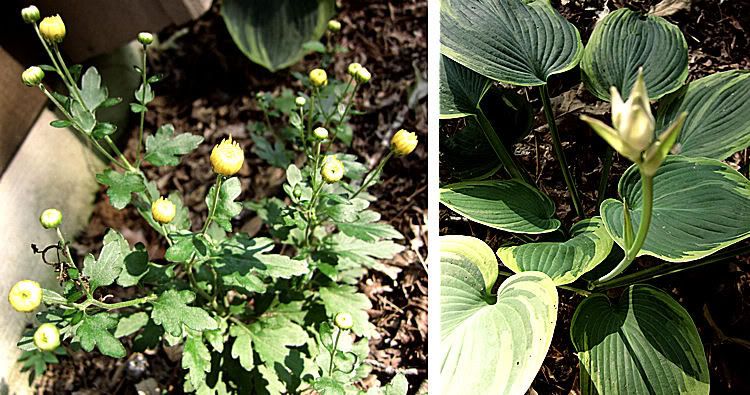
We've also had some small clumps of what I believe are chrysanthemums pop up and one of our hostas put out a single flower. As an amateur gardener, I have no idea what that means, but it was neat!


And as I was looking around for more hidden beauties, I came across what I thought at first glance was a leaf, but upon closer inspection, realized it was a huge moth or butterfly! Talk about great camouflage! Here's a closer look at it from the other side:


And, lest you think that our yard is filled with beautiful widlflowers and garden-worthy greenery, let me tell you—better yet, show you—that you would be quite mistaken!


Our yard is mostly a blanket of fallen leaves and random weeds and sparse vines. That is why finding these spots of beauty in the brambly mess is so satisfying for me, why I have to go looking for these wonderful little surprises springing up.


Eventually, I'd like to get around to doing some shady landscaping, but for now, I'm fine just letting the yard go wild and see what springs up naturally!

Related Posts
The Beauty Within My Own Backyard
Where I Spend Most of My Time: A Peek into My Home Office
READ FULL POST >>

How to Fix “Plumber” Pants and Make the Most of Your Wardrobe

So I wasn’t sure how to delicately title this tutorial as the latest in the Make the Most of Your Wardrobe series.

Basically, this is a sewing trick for how to fix any pairs of pants you have that, when you bend over or kneel down or even just sit down, slip down too low and end up creating “the plumber” effect that shows off the top of your underwear or worse.

It really is the unfortunate consequence of all the “low-rise” pants out there that sit low when you’re standing up straight but dip even lower if you move too much this way or that. Of course it can be hard to find decent pants that aren’t low-rise, so sometimes you just have to make do with what you have.

Hence, this tutorial which can help keep those low-rise jeans from riding down.


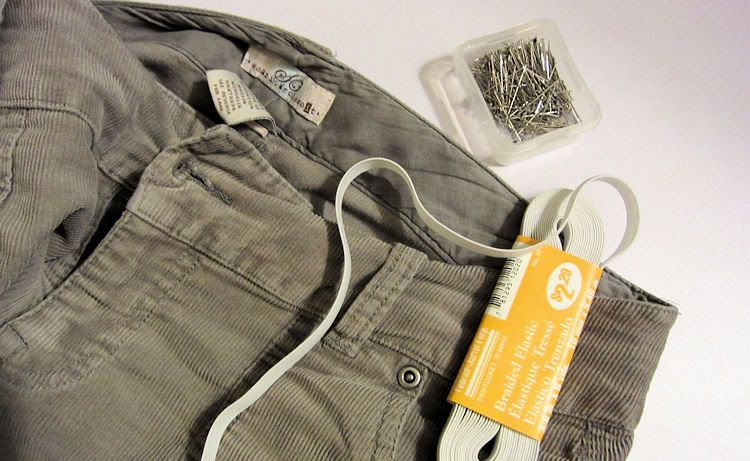
You’ll need your low-rise pants, a piece of wide braided elastic (mine was 3/8 inches wide, you can find the same size online here), thread that matches the color of your pants, sewing pins, and a sewing machine.

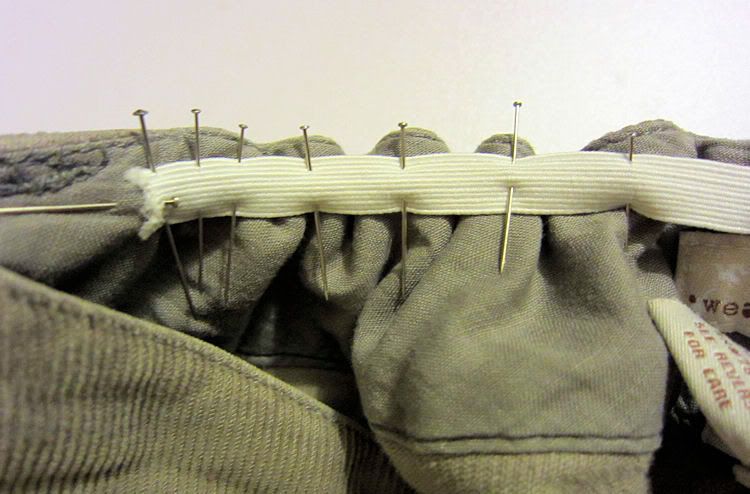
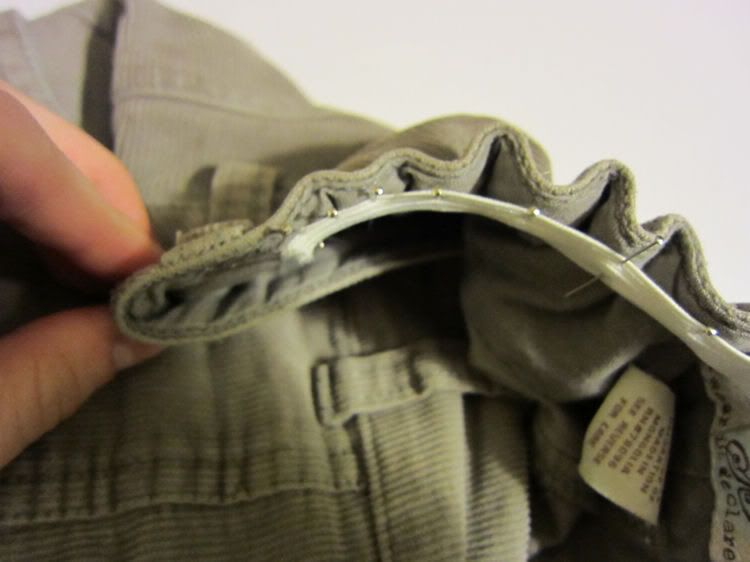
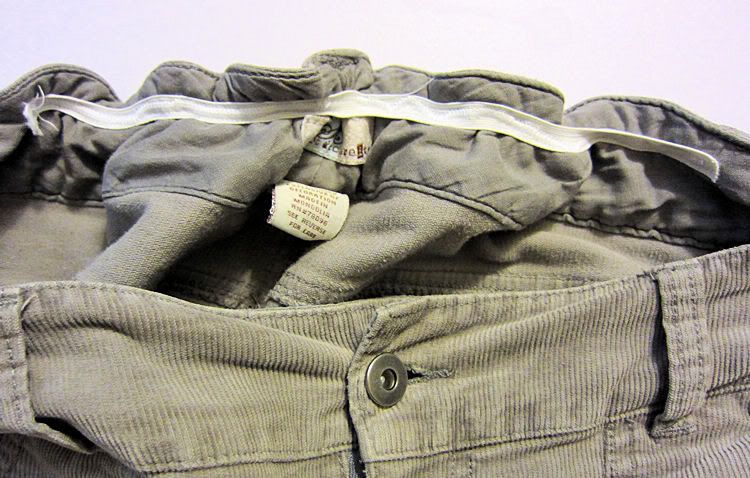
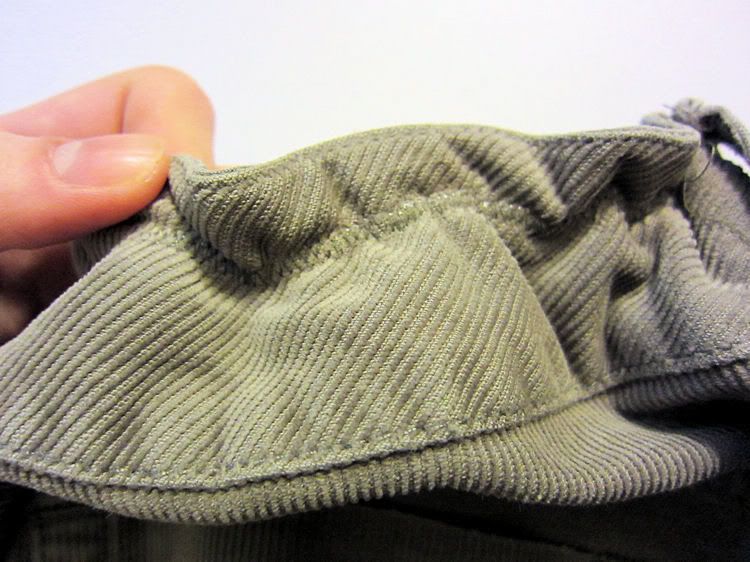
Start off by cutting a length of elastic that, when unstretched, will measure about half the width of your pants. Center and pin it into place along the interior of the back of the pants about every inch or so, keeping the elastic stretched out as you pin. (Note that while you need to stretch the elastic as you pin, there’s no need to stretch the pants as you pin.) When the elastic is not stretched, it will bunch up like this:


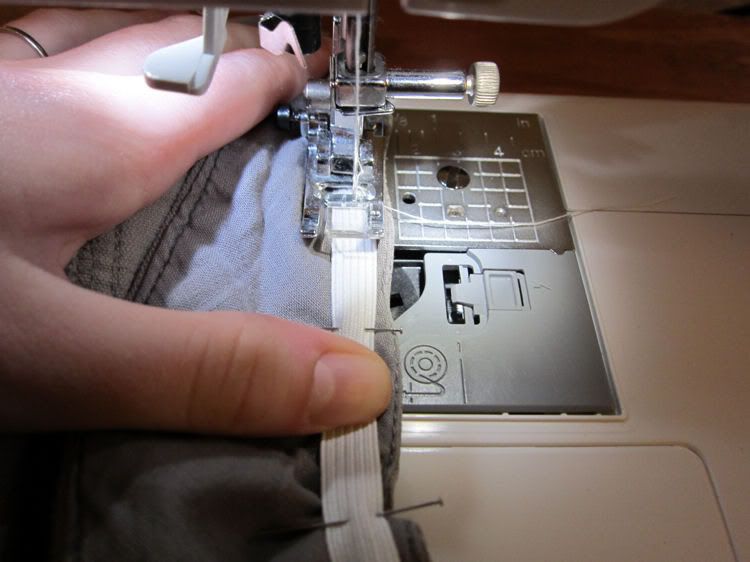
Once it’s pinned, you will sew it in place. (By the way, here’s a newer version of the sewing machine I use.) For mine, I used a white thread for the top-stitch (to match the elastic) and a gray thread for the bobbin (to match the shade of the pants). Just make sure that the thread you use on the bobbin matches the pants.


Make sure to use a stretch stitch, like a zigzag (see photo below). As you sew the elastic into place, make sure that it remains stretched out (see photo above). You might need to guide the pants through the sewing machine with one and use your other to keep the elastic pulled taut.


Note: If your pants have belt loops that the piece of elastic overlaps, don’t sew over the loop. Instead, sew as close to the edge of the loop as you can get and then stop. Then skip over the loop and start stitching again on the other side of the loop. This way, you can still wear a belt if you like!

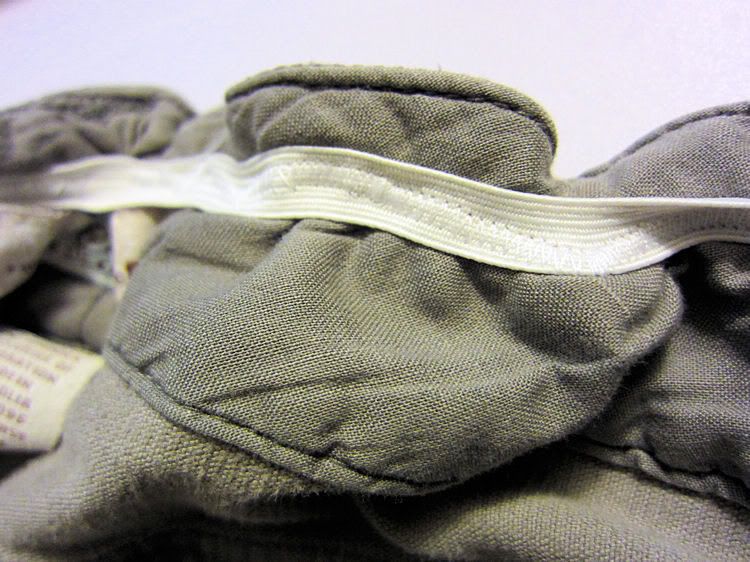
Once you’ve completed sewing the elastic into place, you can cut the thread and remove the pants. Here’s what the pants will look once they’re completed, from the inside and outside:


And that’s it! The elastic will act kind of like an invisible belt to help hold the pants closer against your back whenever you bend at the waist. Depending on how bad the “slippage” was before, the elastic may not completely eliminate the plumber effect, but will definitely make it a lot less extreme.

And, in case you've missed any, you can check out all the tutorials in the Make the Most of Your Wardrobe series here.

Related Posts
How to Fix a Low-Cut Top and Make the Most of Your Wardrobe
How to Hem Your Jeans to the Perfect Length
Bring Some New Life to Your Button-Up Shirts
READ FULL POST >>

The Things You Learn About Yourself When Doing Your Taxes


I mentioned a couple months ago that we hired a CPA to do our taxes this year. When we met with her, she looked at our previous year’s filing and noticed that we hadn’t taken a single deduction or write-off other than the standard deduction, so she urged us to re-submit our return and take advantage of the expenses we could deduct.

Since we discovered that going this route was pretty painless—for our peace-of-mind and our pocketbook—I’ve been going back through our old statements and receipts to go ahead and see if we can try to get a refund for that year. (Let me tell you, we paid a chunk-o-change that year.)

As I’ve been looking up numbers, going through our records and adding up numbers and tallying up expenses, I’ve found myself relishing the experience. There’s something about it that I actually enjoy.

The funny thing is that when I took all those standardized tests back in school, I always did a lot better in the Mathematics section than I did in the English section. Which for someone who has always pined for a literary vocation of some sort, that always came as a bit of an insult to me.

I always fought off the fact that I was actually good at math. I know it runs in my blood; my dad could remember calculus years after taking it, picking it back up and dusting it off like it was a favorite bicycle that he’d kept around all that time, just in case.

In high school, I even had a teacher who pulled me aside and asked me what I was going to major in at college. I told him magazine journalism. He asked—almost pleadingly—that I at least minor in math. I found it flattering, but never gave it a second thought. (I minored in political science, instead.)

But now, older and having spent my time typing and writing and reading, there’s something about the simplicity of numbers and algorithms and equations that I’ve discovered is dear to my heart.

That calculus I took in high school? Well, I never really understood the purpose behind it. But pulling these numbers together for these tax returns, lining them up, adding them up, crunching them together and getting an answer at the end? That’s a math I understand.

I sit here at my desk and page through the other return our CPA did for us. I look at the numbers and see how they add up, how it all came together. And that light bulb—rusty and laid aside for almost a decade now—flips on. It’s a light I realize, only now, that I’ve missed.

I don’t quite get the whole tax code thing, which is why we hired our CPA in the first place. But I start thinking now, maybe sometime in the future, if I ever do decide to enter the traditional workplace again, maybe—just maybe—I’ll go back to those mathematics roots that have been with me all along and give them a little space to grow. Maybe I’ll grow up to be a mathematician after all.

Related Posts
Being Intentional about Saving Money
3 Easy Ways We've Learned to Stretch Our Finances (No Coupons Necessary)


{ photo source }
READ FULL POST >>

Reading and Wrestling and Hope for Us All


In Tara Leigh Cobble’s memoir Here’s to Hindsight, she talks about Lauren F. Winner’s memoir Girl Meets God:

On my flight back from New York, I started reading a book called Girl Meets God by Lauren F. Winner, which might as well be called ‘Why I’m Better Than You.’ In other words, I’m jealous of her. … The author’s stories are the ones I wanted to live. It makes me wonder where I would be if I had not taken this route.
(Here’s to Hindsight, p. 36-37)

I never quite felt that way reading Girl Meets God, but I did feel like I wanted to be friends with Lauren Winner, in the same way that I wanted to be friends with Tara Leigh Cobble after reading her memoir. (They’re both two of my favorites, and I’d heartily recommend them both for reading material.)

So when I heard that Winner had come out with another memoir-esque book (she asserts that it is not a memoir) entitled Still, I couldn't wait to read it, since it's been nearly a decade since Girl Meets God was released.

The thing is, though, that while Girl Meets God was written in the wake of Winner becoming a Christian, Still is written in the wake of her divorce. I don’t know her, but like I said, I always thought if I did meet her, maybe we’d be friends. So when I learned that news—that she had divorced her husband—it kind of took my breath away, especially as a happily-married, couldn't-imagine that wife but more importantly Christian.

If you’re curious to know what went wrong in her marriage or all the sordid details of the marital breakdown, you won’t find it in this book. She actually mentions very little and what she does mention, she portrays all of that with grace and restraint and lots of self-deprecation, placing the blame of the failed marriage on herself rather than on her ex-husband.

But what you will find in this book is how she talks about how her divorce affected her relationship with God, how she found herself feeling disconnected from God. Most importantly, though, what you will find in this book, which I appreciated, is how even in those times of feeling disconnected from God, she pushed toward him, she continued seeking him, even when they were in only in bits and scraps of moments and efforts and thoughts and prayers.

It is a brutally honest book to be sure, and one that I think few would come away from saying that the moniker ought to be retitled “Why I’m Better Than You.” I think few will come away from reading this part of her story and find themselves jealous of the inner and spiritual turmoil she writes of.

This is not the place to discuss the sanctity of marriage or the sin of her actions and how they consequently affected her relationship with God and whether she was "asking for" the turmoil that ensued. That is not the point of this post.

Rather, the thing that captured my heart as I read her story was something that I think is a challenge we all will face at one time another, because that feeling of feeling disconnected from God, like he's pulled away from us, is a common one, I think, no matter whether it's caused by sin of our own or just the journey of faith.

The thing is, which I think Winner showcases in the book, is that in those moments we have to push on in our faiths, that even when we don’t “feel” like it, when we don’t “feel” close to God, that we still have to push through and fight for our faith and press to reconnect to him.

Too often, I think when some people find themselves at that juncture—whether it’s because of broken dreams or unanswered prayers or just a life that isn’t what they’d expected—they give up. Instead of fighting and pushing and pressing on, they give up.

And that just grieves my heart.

Because it doesn’t have to be that way.

In the Old Testament, we see Jacob who wrestles and wrestles and doesn’t let go until he gets that which he seeks, until the morning when he’s granted a blessing. There’s a lesson in that story, an archetype for all who have followed in his footsteps, Jacob, now renamed Israel: Sometimes we must be willing to wrestle and not let go until God reveals his face to us, until he relents and gives us his blessing.

And that is what I saw in Winner’s raw and honest and heart-wrenching book, Still. I saw proof that if we do not let go—even when our heart and our circumstances and our feelings tell us otherwise—that, as James 4:8 says, “Come close to God, and God will come close to you.”

Let us not give up on God, on our faith, on his Love that overcomes even the darkest of days and sorrowest of sins. Let us come close and wrestle until we receive the blessing of his presence.

(Here are links for finding Here's to Hindsight by Tara Leigh Cobble, Girl Meets God by Lauren F. Winner, and Still by Lauren F. Winner on Amazon.)

Related Posts
Why I Stopped Reading Books.... 
Having the Faith to Truly Embrace Grace: What I'm Reading Right Now
READ FULL POST >>

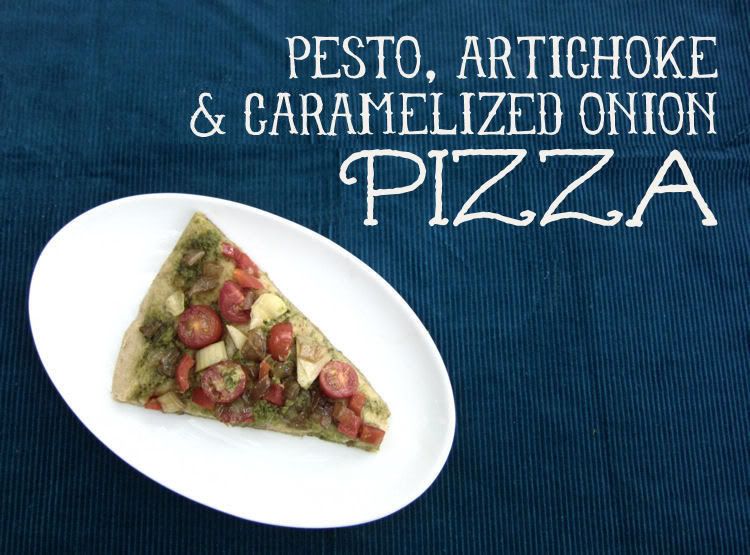
Pesto, Artichoke & Caramelized Onion Pizza on Homemade, 100% Whole Wheat Dough


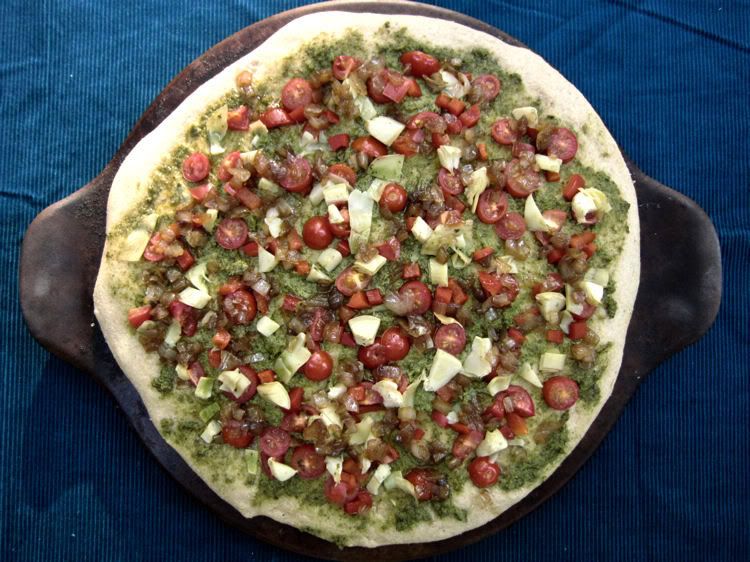
As a part of my New Year’s resolution to try cooking with a new food each month, my challenge for the month of May was to use artichokes. In doing so, I discovered one of my new favorite recipes: Pesto, Artichoke & Caramelized Onion Pizza.

While on a trip to Washington, DC, my husband and I ordered a similar pizza, so when we came home, I knew I wanted to try to recreate it for my Adventures in Trying New Foods challenge. So, I went to task and came up with this veggie lover delight, which you can make with or without cheese. (Really it doesn’t need any additional cheese, but I’ll let you be the judge of that!)

I loved it so much that I whipped up two of these pizzas in one week and then have made another almost every week since. This recipe is a keeper.

So without further ado, the recipe for how to make Pesto, Artichoke & Caramelized Onion Pizza, from making a 100% whole-wheat crust to adding the toppings. Enjoy!


100% WHOLE WHEAT PIZZA DOUGH RECIPE

⅔ cup hard red wheat berries
1⅓ cup hard white wheat berries

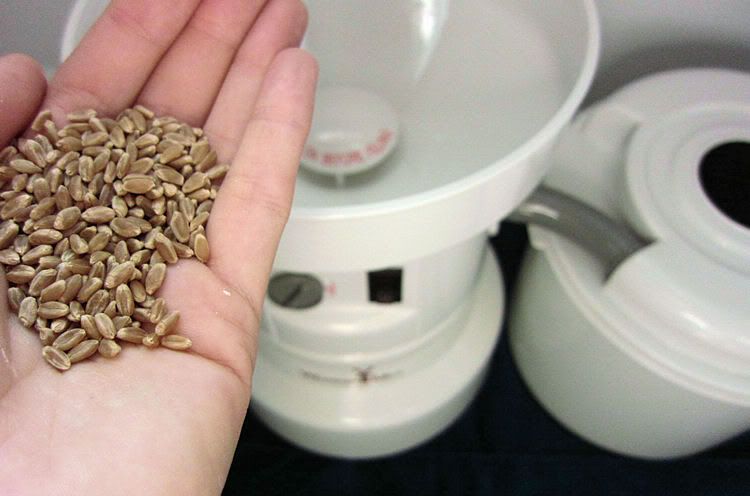
Grind the wheat berries in your grain mill of choice (I use the electric WonderMill Grain Mill) to a fine flour, suitable for bread-making.


1 cup water
2 Tbsp. olive oil
1 tsp. salt
1 Tbsp. sugar
Freshly milled flour (alternatively, you can use my recipe here for making pizza dough with store-bought flour)
2 tsp. bread machine yeast

Combine all ingredients in a bread machine (mine is similar to this one) in the order listed above (meaning, add the water first and add the yeast last). For the yeast, make a shallow well in the middle of the flour and add the yeast there.

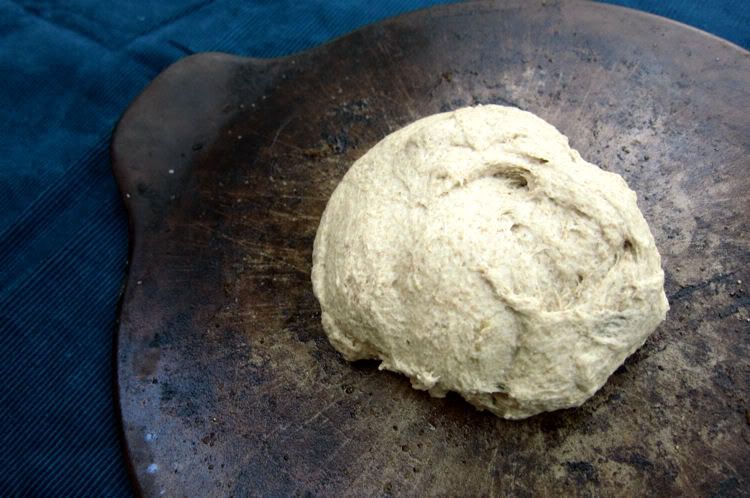
Select "Dough" setting on bread machine, and press "Start." When the dough has risen long enough, the machine will beep. Turn off bread machine, remove bread pan, and turn out dough onto a lightly floured surface. (I like to use my trusty baking stone for this.)


Use rolling pin to flatten dough into a disk. (It should make one 12-inch pizza, or you can divide the dough in half to make two smaller pizzas.)


PESTO, ARTICHOKE & CARAMELIZED PIZZA TOPPINGS
1 cup onion, finely diced
2 Tbsp. olive oil
1 Tbsp. balsamic vinegar
2 Tbsp. sugar
1 cup pesto
1 cup tomatoes, finely diced
½ cup red pepper, finely diced
½ cup marinated artichoke hearts, finely diced

In a saucepan on the stove, combine the onion, olive oil, balsamic vinegar and sugar. Stir to combine and bring to a boil. Let simmer until onions are caramelized.

Meanwhile, spread pesto onto rolled-out pizza dough. Add all the other toppings, including the caramelized onions.

Bake in oven at 350 degrees for about 20 to 25 minutes, or until crust is starting to turn golden. Remove from oven, and let cool for about 5 minutes before serving.


Related Posts
Build a Better Pizza: Make Your Own Pizza Dough 
A New Years Resolution: Adventures in Trying New Foods
READ FULL POST >>
Next Post Previous Post
Related Posts Plugin for WordPress, Blogger...