Showing posts with label our home. Show all posts

A Sneak Peek at the New House!

It's been about a month since we bought our house, and we've spent the past weeks doing project after project to make it look like it's been our own all along.

There still a ton to do (and frankly there probably always will be) but I figured it was time to give it to share a little sneak peek (with slightly blurry cell-phone pics).


The first thing we did when we bought the house was give the living room, dining room, and kitchen fresh coat of white paint, thanks to a lot of help from friends and family. That change alone did a lot to update the house and make it feel a lot brighter and show off the natural light that streams in from all the windows.


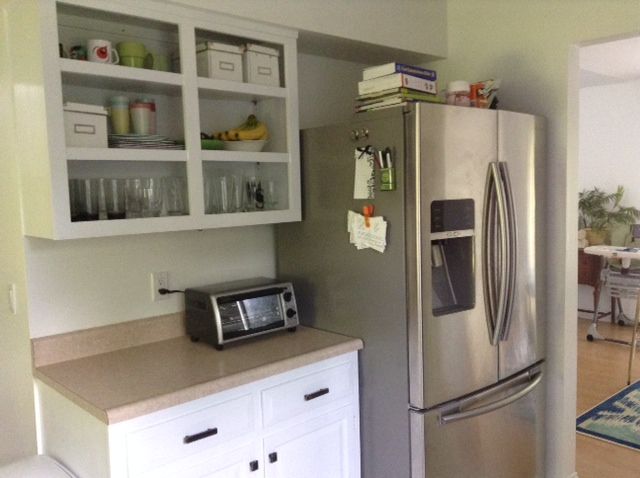
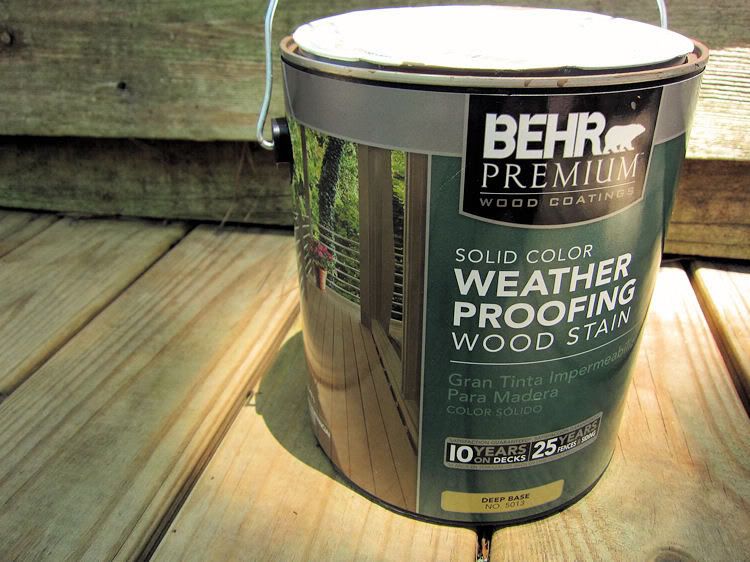
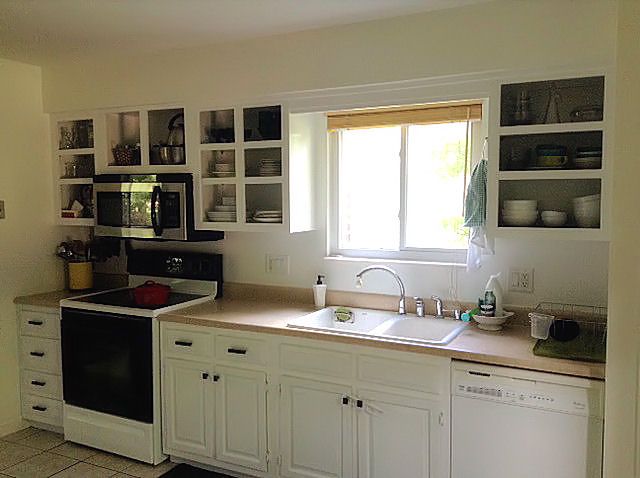
After that were a series of other projects, like repainting the kitchen cabinets, removing the doors to make open shelving and adding new hardware. Previously the owners had given the cabinets a really bad faux bois paint effect, so sanding and painting them white was a huge improvement right there. But I've always had a thing for white kitchens so I was pleased to finally have my own. The one thing I didn't expect however with how much dirt the white would show. That's why I was excited when Mom's Meet and Walgreens sent me some of their new cleaning products from their exclusive natural-products brand called Ology.


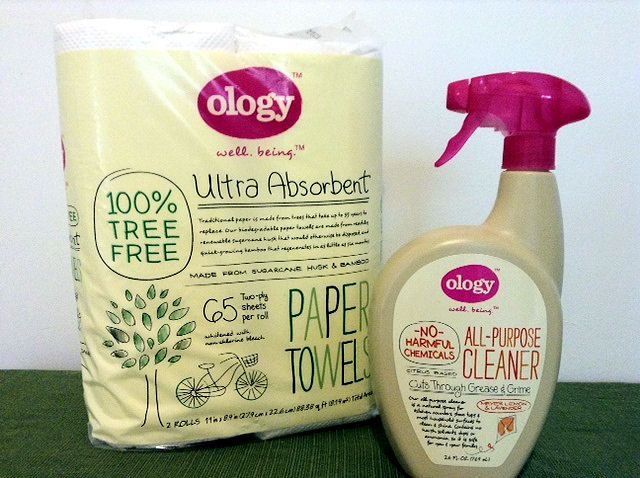
They make cleaning up any of the fingerprints left on the cabinets or food splatters a breeze. Plus, the all-purpose spray has a lovely basil lemon scent that freshens up the kitchen beautifully, and I adore the fun packaging. There are tons of other Ology products, from household cleaners to baby products (which I can't wait to try!), toiletries to toilet paper. I have also been using their free-and-clear laundry detergent, which I've found to be gentle on clothes and our sensitive skin while still fighting stains well. I love that like all the brand's products, they are free of dyes, artificial fragrances, phosphates, harmful chemicals and instead feature natural plant-based and mineral-based ingredients.

The last stop in the kitchen (which I didn't photograph), is a corner nook. I'm searching for a table and chairs to fill it, but for now a tableclothed card table is doing the trick. And I envision a lot of fun, colorful artwork hanging on the walls but those are usually finishing touches for me.


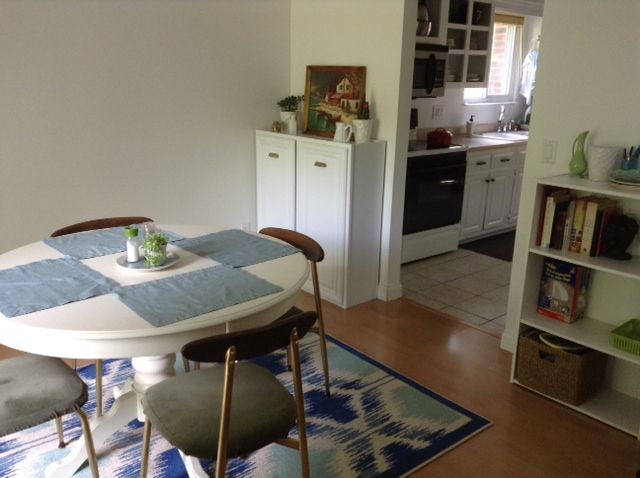
Because we lost a lot of kitchen space compared our old house, I had to get smart about creating storage in other places around the house. For instance, I made a China cabinet fashioned from an old cabinet that was in the garage of our old house by painting it white and adding classic gold cup pulls. Inside you'll find a lot of our plastic Tupperware and extra cups and mugs that don't look pretty with the open shelving. It sits in the dining room that adjoins the kitchen, so everything is still at hand whenever it's needed. (Pretty sure that artwork will hang here but as I mentioned earlier, I like to save art-hanging for last.)

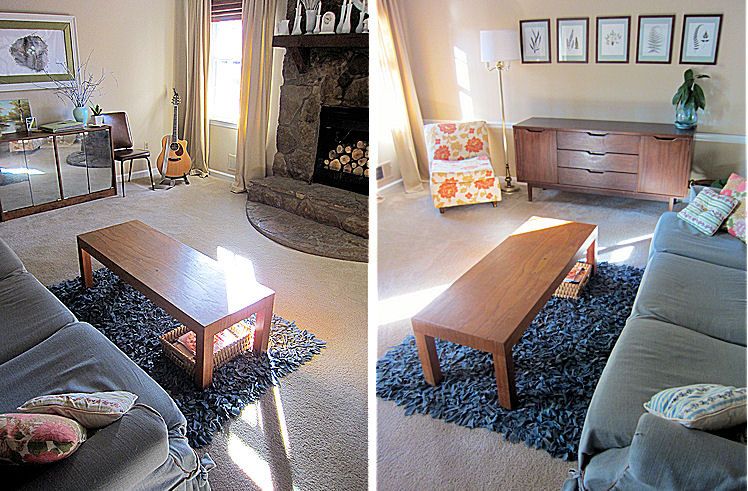
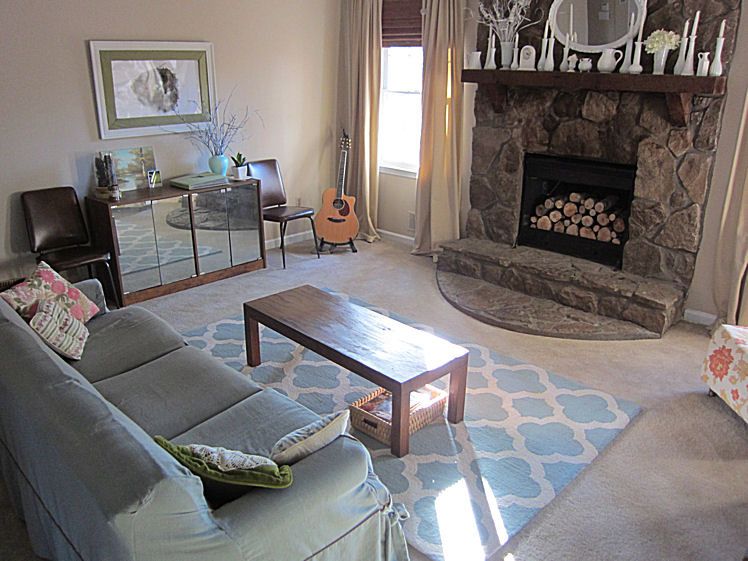
The dining room segues directly into the living room, which features some really great, tall walls with windows at the ceiling that allows for tons of natural light. (And hence, plenty of potted foliage!)


Oh and did you notice anything else? We finally broke down and got a television as our Christmas present to ourselves this past year. We got a Roku and a digital antenna and have been quite pleased! They've made for a great way to rewind after a day spent toiling over project after project.


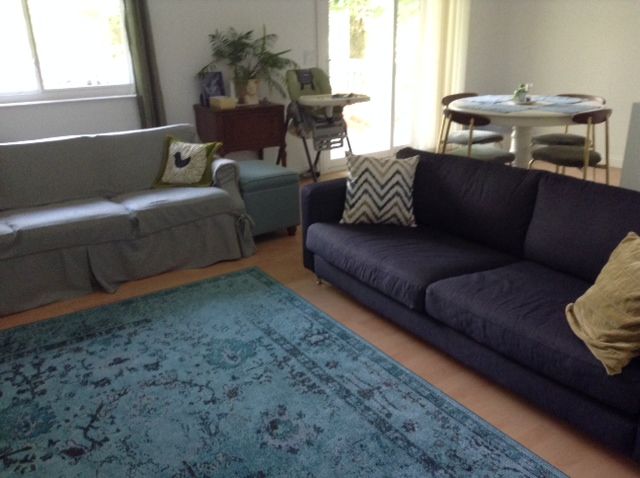
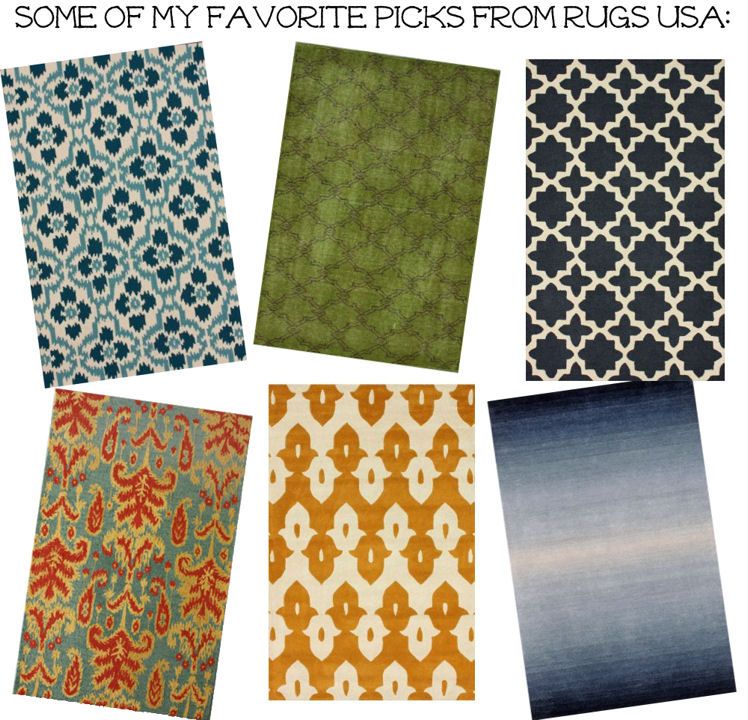
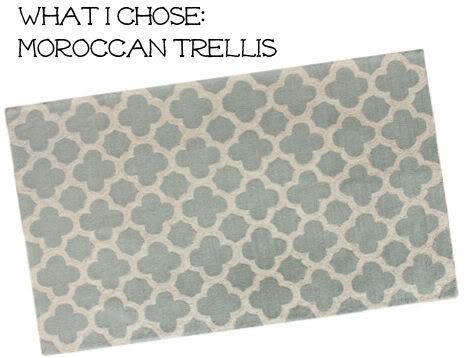
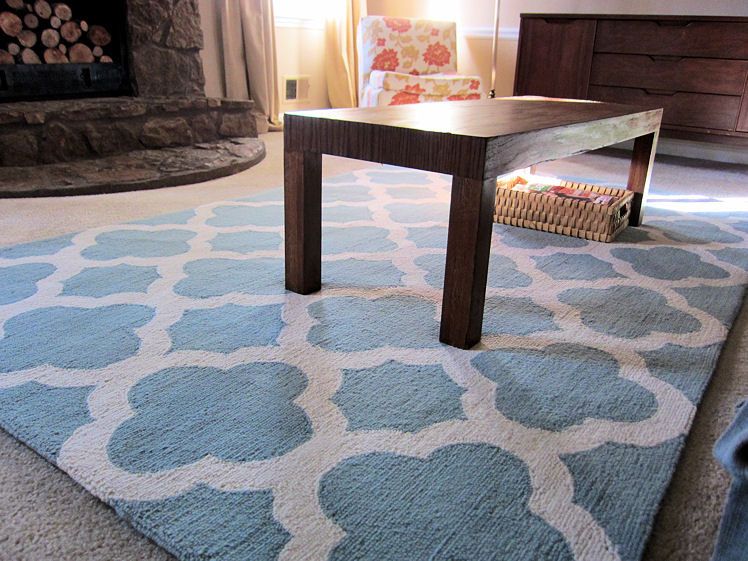
One of the things I was excited about with having wooden floors in nearly every room. Along with that, however meant upgrading to more rugs, and finding ones with personality proved to take some sleuthing but I think we hit the jackpot with the living room one. I love the lived-in feel it adds and the spunky color that ties in with the lampshades I picked up at a thrift store.

That is pretty much the main level, save for the entry way but there's really nothing to showcase there. I'm going to suspend the tour here because this is where most of the work has taken place and the updates are most evident. I'll try to post another update of one of the other floors in another couple weeks. Till then, I'll be keeping myself busy with projects aplenty and a cute little kid running around the place!

(I received the Ology products for free from the sponsor of the Moms MeetSM program, May Media Group LLC, who received it directly from the manufacturer. As a Moms MeetsSM blogger, I agreed to use this product and post my opinion on my blog. My opinions do not necessarily reflect the opinions of May Media Group LLC or the manufacturer of the product.)
READ FULL POST >>

A Week In Our New Home


It's been a week now that we've been living in this place that we now call "home." And a little less than two that we've owned it. And yet, it seems so much longer than that.


In that short amount of time, we've had friends and family give up their own busy schedules to help us paint and organize, drop off meals, watch Claire. We've put together new furniture, started dozens of projects, made incredible progress and already mopped up a geyser of water from a washing machine gone ruly. 

Our sweat and elbow grease are all over this place and it shows--it finally is starting to feel like us.

It is a grand thing, this place of home. And Claire already understands that, somehow knowing that the room with the room with the brightly-colored carpet and neon walls is hers. She loves opening all the cupboard doors and playing on the open deck. I think she understands this is home, our home.
READ FULL POST >>

A Crafting Fail: What Happened When I Tried Painting The Nursery Curtains


I think it’s no surprise to anyone who reads my blog that I love crafts. I’ve documented recovering my kitchen chairs, turning a media console into a mirrored cabinet, hemming my jeans, even baking my own sandwich bread. There’s something about making things with my hands that pulses through my blood.

It’s even one of the things I’m excited about most about having a daughter and getting to share those experiences with.

And the fact is that one of the reasons why I love crafting so much is because, honestly, they usually work. Before taking on any project, I usually do enough research or preparation and planning so that the end result is at least close to what I’d imagined in my head. Plus, I typically try to use resources I already have on hand so that even if the project does go awry, it didn’t cost me anything.

Recently, though, all that changed and I was confronted with one big epic craft fail. Disappointing to say the least.

But, I figured that all of you might appreciate seeing the other side of the crafting life, where things don’t always go as expected and sometimes a project that you had big plans for and great expectations of just doesn’t pan out. At all.

So it was with one of my nursery projects. I had a set of black-out curtains that I wanted to use in the room, to hopefully help our little one want to sleep longer by blocking out the sunlight in the early hours. The only problem was that they didn’t match my color scheme and I’ve never had much luck finding black-out curtains in any shade but brown and black.

I’d seen plenty of projects on Pinterest and elsewhere of people painting fabric of all sorts—curtains, rugs, couches even. And they all seemed pleased with the results.

After doing my research, I picked up my supplies: a can of 100% acrylic paint (no-VOC) in a pretty teal color and some fabric medium. I mixed the two together according to the directions and started painting. I soon realized, though, that the fabric sucked up a ton of paint, so that it took a lot longer than it would have for the same-sized portion of a wall. I sat hunched over a single curtain panel for an hour and a half, just applying a single coat and getting into all the fabrics’ nooks and crannies.

After letting it dry for an hour or two, there were obvious markings of where one section had dried before I’d gotten to painting the area next to it. I decided to do a second coat, since that’s pretty standard for painting walls. Another hour and a half later, the second coat had evened out a lot of the marks, but it still dried splotchy and, even worse, stiff. Plus, after three hours hunched over painting, my (pregnant) back was pretty stiff itself. I had to then go take an hour or so nap just to recover.

I hung the curtain just to see if it was really as bad as I thought. I let it hang there for a day, opening and closing the panel and having to crunch it into place. It did great at blocking out but as I looked at the other three panels that awaited, I knew that I couldn’t invest 9 hours into creating something I didn’t love. Plus, I’d used almost a whole quart of paint on that single panel so I’d have to go buy a lot more of the supplies.

Like a weary but realistic fighter, I knew when to the throw in the towel and wave the flag of defeat. Fortunately, I ended up finding some black-out curtains in a lovely dark, teal hue on sale that couldn’t be more perfect: (I seriously could not believe my luck!) They block out light, they aren’t splotchy, they aren’t stiff, the color is a great fit, and it only took me about an hour to hang them in place, from start to finish.

I’m glad I tried the project, though, because in my head I was certain it would work. But in the end, things aren’t always as they appear—especially on Pinterest.

Related Posts
(Finally!) Introducing the Baby's Nursery
A Few of My Favorite Things: Craft Supplies Edition
READ FULL POST >>

(Finally!) Introducing the Baby's Nursery


It's been months since I first started working on the baby's nursery for our little girl. I started off by sharing some of my brainstorming and idea boards for decorating the nursery, including the color scheme and fabric ideas I had in mind.

Then, I shared some of the progress we'd made once we finally painted the nursery a creamy white and got some of the major furniture items in place. We also painted the interior of the closet a vibrant, sunny yellow.

And then? Well, things kind of went to a standstill while I got busy working on other preparations. But, little by little over time, I started working on the nursery again, until a couple of weeks ago when it was basically done. (And then, I had to wait for the clouds to clear to get a decently sunny day to try to accurately document the updates!)

But, finally, with days left until my due date, here is the reveal of the nursery that awaits our little girl. With sheets on the crib, toys and books on the shelves, and freshly washed onesies on hangers, I think we're ready to bring babe home!


As you can see, we stuck with my initial plan of going for a peacock, teal and yellow color scheme for the nursery. I love how the white walls make the curtains and rug pop!


This is some artwork I created for the room: The square frames feature antique handkerchiefs my mom had given me and a pair of pretty-patterned cloth napkins from my mother-in-law. The large piece is one I painted (and typeset myself!) with some words that felt fitting for this bundle of joy of ours.


Here's the little sitting and nursing area I have set up, complete with a pouf for setting my feet in the middle of the night! I also used a couple of extra of the patterned napkins to create covers for some pillows I already had on hand.


We opted for dark wood tones in this room, and so picked out this cube shelving to store her toys, books and my nursing gear. As you can see, she has quite the accumulating collection of owls! (And the ceramic owl atop the shelf is actually winds up to play music and spin around!)


Here's her crib, with the crib skirt I created for her. (Although you can't see the pattern clearly here, it's the same that I used when I recovered our kitchen chairs a couple years back, which you can see detailed here.)


I decided not to put any real art on the walls around her crib for fear that if they fell, she could really get injured. So instead, I hung a mobile made of birds-in-flight that I cut out from construction paper in the room's various colors.


On the opposite side of the room, we have her dresser and closet, which are fully stocked with plenty of clothes, blankets and all the other essentials we've collected for her. And, in the corner you'll see a life-size Scooby Doo dog, which was mine when I was really young that I've held onto ever since. I hope she loves it as much as I did!

Related Posts
Making Progress on Decorating the Nursery
Brainstorming Decorating Ideas for the Nursery
READ FULL POST >>

Celebrating A Year In Our House


I can’t believe it but somehow, a year has passed since we first bought and moved into this house of ours. A lot has happened in these past twelve months: First, we saw God open up the opportunity for us to move here. Then, we did a bunch of DIY projects to make the place feel more like home. We watched the seasons change all around us as surprises sprang up around us and I explored the natural wonders of this wild yard of ours. But most of all, it was in this house that we found out we were expecting our first baby.

I remember when we first moved in and it still felt all surreal. I was still grasping for phantom light switches in the places they’d been in our old apartment. Now, it feels like home. Even the places that stick out like sore thumbs (the half-finished crown molding in a couple of rooms, for instance) now are familiar and, in some ways, comforting. Because they are no longer foreign but they are the quirks of home—of our home.

I’ve watched as we take on little projects here and there, learning and growing as homeowners. Rooms have been transformed from drab tan boxes into places that reflect us. They hold all number of craft projects and personal touches, announcing to the world that this place is ours. It is where we call home.

And this home will continue to see changes. Likely more routine upgrades like painting the remaining walls, fixing those pesky crown molding issues, doing something about that tangle of a yard of ours. But also bringing a baby into here, introducing her to her new home. Where the paint color might not match the rug or the wood finishes might clash, but love abounds.

That’s home.

Related Posts
A Sneak Peek at Our New House
On Buying a Small House
READ FULL POST >>

Making Progress on Decorating the Nursery


I've been thinking for quite some time about the room that will someday be my little girl's. I shared an inspiration-board post with some of my ideas and brainstorming for decorating this room for her:


But it's taken me quite some time to get around to actually working on the room. (Although I place a lot of that blame on my impromptu hospital stay and kidney calamity for much of October.)

Finally, though, it's coming together. It's still not finished yet, as I regroup and try to figure out how I want to tackle the artwork and wall decorations for the room. (Which I'm beginning to realize seems always to be a hang up for me when I'm decorating any given room.)

At any rate, progress is being made, so I wanted to share a progress report with you...

In my mood-board post for the nursery, I mentioned that I wanted to go anti-nursery and paint the walls cream. I have to admit that I love cream walls. (That was something I always loved about apartment living--walls were always painted neutral colors, of which cream was often a popular choice.)

But I always chickened out of painting my own walls white or cream. I am not quite sure why, if it feels like a waste painting a wall white when you could be painting a vibrant, splashy color, or if I don't trust my own instincts.

With this room, though, I finally committed to giving my love-for-white-walls life. After doing some research on paint colors, I picked the hue "Swiss Coffee" from BEHR, which they sent me to spruce up the baby's room. The name makes it sound like it would be tan, but it is actually the perfect shade of milky cream. I like it because at first glance, though it looks white, it has just enough cream in it to soften it up and keep it from being stark and sterile. In fact, "Swiss Coffee" is one of their most popular shades for cream!

And since we were DIY-ing this project, we picked their Premium Plus Self-Priming, Zero VOC and Low Odor Interior Paint, so that we wouldn't have to worry about me breathing in any pesky fumes that might hurt the baby. Plus, they offer it in an eggshell finish, which is a good finish for kids' rooms since it is easy to clean!

Here's what the room looked like before we painted it (previously it served as our home office, which I featured in this post):


Those tan walls may not look it in the photos, but they were not in great condition. There were quite a few scuff marks and holes and glow-in-the-dark-stars that had been painted over (instead of peeled off before applying the paint). Fortunately, with a little spackle and two coats of the BEHR paint, all those imperfections melted away—even the dozen or so glow-in-the-dark stars that I wasn't able to scrape off!

Then, we started moving the furniture into the room, making use of as many good-quality hand-me-downs as possible to save money.

Here's what it's looking like now:


I love how the creamy walls makes the yellow and teals of the accents pop and allows me to have more fun with those accessories.

And, don't worry; I'll share more specifics about the room in a later post and keep you updated once I make some decisions on the artwork. But so far, I am loving how this room is coming together and heralding the arrival of our little girl, waiting in the wings!

Related Posts
Brainstorming Decorating Ideas for the Nursery
What We've Done Around the House So Far
READ FULL POST >>

An Easy Makeover: Updating Our Living Room with a New Area Rug

While much of my decorating energy has been funneled toward preparing the nursery (more on that soon!!), our living room also got some much-needed attention recently.

For a long time, we’ve had a blue rag rug that sat under our coffee table. It was there in our first apartment and then again in our second. So it’s no surprise that we followed tradition and put it in the same spot in our house.

But as the living room has fallen into place—with my media-cabinet overhaul and the new buffet along the wall, the rug was begging for an update. It was too small for the space and the color was quite a bit darker than anything else in the room. It simply didn’t fit.

Here’s what it looked like before:

OUR LIVING ROOM: BEFORE

So for quite some time, I’d been looking for a replacement, shopping in stores and poking around online. But if you’re looking for something that doesn’t involve dark reds or browns or an oriental pattern, most of what’s out there will leave you pretty disappointed.

I was about to give up when I came across Rugs USA, which has a huge assortment of area rugs that you can browse by category (contemporary, animal print, shag, etc.) or color. I went straight to the contemporary category and fell in love with the variety to choose from:


Plus, they’re almost always running a sale so even a rug that may originally run $250 will sometimes be marked down to $100, particularly around the holidays. (I’d recommend signing up for their email sales alerts to know when their big sales take place—I’ve seen them offer up to 75% off!)

I got the chance to review one of their rugs and ended up picking out the 5x8 size of their Homespun Moroccan Trellis Area Rug in blue:


I thought it would draw together the dusty blue hues of the couch cover and the botanical prints well. And when the rug arrived—days later—the color shown on the site was almost identical to the one I unrolled in my living room. Plus, it’s 100% wool and hand hooked, so there’s no shedding to worry about and still cushy underfoot.

I put it into place in front of my couch and, after giving the coffee table a quick makeover too with a darker stain (so that it wasn't quite as garishly orange), the living room seemed that much more pulled together:

OUR LIVING ROOM: AFTER


I love it and how it really ties the entire living room together. What do you think?!

Related Posts
My Secret Weapon to Decorating My House 
Fighting the Desire to Decorate to Perfection
READ FULL POST >>

Brainstorming Decorating Ideas for the Nursery


Originally, I wasn’t expecting to do anything about setting up a nursery for the baby until later in my pregnancy, maybe January. But while talking to a few different people, they suggested getting it done before I hit the 6-month mark, because there’s a good chance I won’t feel up to it around then. After talking it over with my husband, we decided to play it safe and he’s taking a few days off work so that we can hammer out the nursery projects by then.

We’ll be doing the nursery revamp the last week of October, and in anticipation of that, I wanted to share some of my plans for setting up and decorating what will soon become the nursery.

First up, we’ll be converting what’s currently our office into the nursery. (You can check out a full sneak peek of our current office set-up in this post here.) This gives you something of a glimpse of what the room currently looks like, as our home office:


To make room for the baby, we’ll move our desks into what we’ve set up as our “library,” which is technically the house’s small dining room. But since we have a nice-sized eat-in kitchen (you can check that out here), we didn’t have any need for an extra set of tables and chairs, which works out perfectly for accommodating this switcheroo of ours. With one full wall of bookshelves, the library is quite a bit smaller than our current office set-up, so arranging our desks and chairs and office equipment might be something of a challenge. But isn’t that part of the fun of living in a small space?

With the desks cleared out, then we can start working on the nursery itself.

First up, we’re going to give the room a fresh coat of (no-VOC) paint. I actually am planning on going a little anti-nursery with my paint choice because I am going to paint the walls cream (currently, they’re a khaki color). My thinking here is that I want to be able to play with really bright accessories throughout the rest of the room without worrying about there being too much going on. Plus, I like the idea that cream is always in and can easily grow with our child. So if he or she goes into a red phase, we can update the room by swapping out pillowcases and painting the picture frames. I think it’ll offer a good deal of flexibility for future decorating possibilities.

As for the accent colors, I’m planning on mixing earthy, jewel-toned hues like aqua, pistachio green, mustard yellow and maybe some dashes of peacock blue. I’ve already decorated with those colors for years, so it makes sense to keep that theme going here. I also like the idea that this combination of colors is really gender-neutral so that if future kids are different genders, the stuff in here would still work just fine. I have in mind quite a few objects I want to paint these colors (a lamp, fish book ends, picture frames, etc.), so I’m looking forward to playing around with this color scheme!

Here’s a color chart for the hues I’m planning to choose from, as well as the dark-wood grain that I’d like for the furniture and fabric ideas I’d love to pull in for things like the crib skirt:


I’ve actually already started a couple of projects in there, including hanging some black-out curtains that I already owned. I have plans to freshen them up by painting them one of the fun, accent colors; probably the aqua. I’ve never tried painting fabric before, so fingers crossed it works!

Another project I’ve already started on is re-organizing the room’s closet, which is pretty large but I wanted more shelving in it and I wanted to move the closet rod lower, so that hanging clothes are more accessible for shorter arms once the baby’s older. So with measurements in hand, I went to the hardware store and picked up some planks of wood (which barely fit in our car!) that I brought home and cut to size using my super-affordable hand saw. I’ve primed them and filled in various holes in the closet walls, but have yet to hang the shelves.

Other than that, most of the real work will be happening later this month. Stay tuned, because I’ll be sure to update with more photos of the progress then!

Related Posts
On Buying a Small House
My Secret Weapon to Decorating My House
READ FULL POST >>

Exploring the Beauty of My Backyard: September Edition


When we bought our house last November, it was the interior that sold us. (You can see a sneak-peek at what the house looked like when we first bought it here.) We loved that the outside was filled with tree after tree, but all the leaves had fallen and hidden the rest of the yard beneath a blanket of fallen foliage and pine needles.

So now that we are rounding the bend on almost a year of living here, it's been like a secret garden to see what pops up as each season segues into the next, to see what has been lying hidden beneath the surface.

Back in February, I spent an afternoon exploring all the natural beauty that was hidden throughout my yard. And then in March, I shared an update of the new things that had sprung up. In June, I looked at the new sights that had come to pass as summer was heating up.

Now, about three months later, there's still more popping up! I love the fact that even though spring, traditionally the season when we celebrate all things made new, is long past, there's still one thing after another showing up around our yard.

Here are some of the new sites we've been pleasantly surprised to find spring up around our yard most recently:


We had some chrysanthemums come up a couple of months ago, but when the heat shot up, they stopped flowering. Now that temperatures have tapered a bit, the rest of them have been unfurling a few pretty buds. Once they brown, I'm hoping to harvest the seeds to plant more for next year!


This is pretty much the only kind of "grass" that is growing naturally in our yard, known as liriope or lilyturf, which has been throwing up pretty flower stalks the past few weeks. It's a really hardy grass that lasts through the winter and is known for spreading so I'd like to transplant some of it to the more bare spots in the yard to bring in additional greenery.

But the biggest new sight that's made an appearance in our yard recently has been a slew of mushrooms! All shapes and sizes and colors have been spotted:


I'm also pleased to report that the compost bin I started back in late June is going really well! I've been faithfully adding to the bin every week or so (adding plenty of "browns" each time) and turning the interior about once a month. And it hasn't been smelly or attracting flies at all, even in the Atlanta heat, which was my biggest concern.

Much of the refuse has broken down quite quickly (probably owing to the hot temperatures), although when I turned it the other week, I did note some corn cobs that might take awhile. Also, a couple of fruit seeds (probably from an apple core or the like) had sprouted in there, so it seems the mixture should work out well for spreading around our yard next spring!

How are things faring in your yard? Any new surprises lately?

Related Posts
What "Going Green" Looks Like For Me
The Beauty Within My Own Backyard
READ FULL POST >>

My Latest Home Project: Staining the Deck

We’ve now lived in our house for about eight months. And over that time, we’ve been slowly making updates to add personality to blank walls (like when we painted our kitchen), decorate rooms that reflect us (like when we gussied up the guest-bedroom), transform furniture (like my media-cabinet overhaul) and lots of other projects and crafts here and there, which I’ve documented in full here.

One of the big overhauls that awaits us is taming our yard, which I talked about in this post. Down the road, that’ll entail quite a bit of dirt and digging, but in the meantime, we decided to take on another outdoor project that was a ton easier and delivered a much-needed makeover: Staining our deck.

The previous owners had built it not too long before they put the house on the market, so it was in good, structural shape, but it still retained its raw, pressure-treated wood state that just looked unfinished, especially sitting up against the house itself, which is cedar-sided. Here’s what it looked like:


The light-on-dark wood just clashed terribly and was something of an eyesore. Plus, since the wood wasn’t stained at all, it was absorbing lots of stains and molds that aren’t good for it in the long-term.

So, we decided we wanted to stain it to give it more longevity and a freshly polished appearance. When I sat down to do some research, I came across BEHR’s exterior deck stain products in their Premium Wood Coatings line.

One thing that immediately jumped out to me is that some of their stains are guaranteed to last 10 years on deck surfaces and 25 years on fences and other vertical surfaces. While I love a good craft, I don’t want to have to spend every other summer re-staining my deck, so I was thrilled to discover this possibility!

That satisfaction guarantee comes with their solid-color stains, which go a long way to cover up any blemishes or imperfections in your wood (especially the markings that were visible on some of our pressure-treated wood) and is self-priming. It lets some of the wood grain show through, but gives it a uniform appearance. (If you do want more of a visible wood grain, you can also choose their semi-transparent and transparent stains, which come with 6- and 4-year deck guarantees.)

I took the color chart provided and tried to match the color up to our existing siding, electing to go with the Tugboat color. (There are more than 50 solid-color and semi-transparent stain hues to choose from, as well as 6 transparent stain colors—for more than 100 to give you the exact look you’re going for!)


BEHR provides a complete weatherproofing line of products, including the products you’ll need to prep the surfaces as well as the stains themselves. So for this project, I got some of the Tugboat solid-color stain from the BEHR Premium Wood Coatings line, along with their All-in-One Wood Cleaner.


The first step was prepping the wood surface, which had gotten pretty stained and weathered from sitting unstained for the past year or so. Using the All-in-One Wood Cleaner, I mixed it up with water and sprayed it over the surface and then scrubbed it into the wood grain.


You let it sit for a few minutes and then hose it off. It’s incredible the difference the cleaner made to the wood; it really did make it look like new again! (The great thing about the cleaner is that it eliminates the need to pressure-wash the wood, so no machines to rent or worry about!)


I let the deck dry sufficiently for about 36 hours before I started staining, because you want the stain to adhere to dry wood. Then, I just started brushing it on, working it into the wood grain as I went. I’d read a lot online that you have to be really careful with stains because they can leave “lap marks,” but I found that the solid stain color was incredibly forgiving and I didn’t have a problem with it at all. It went on smoothly and dried pretty quickly, leaving the wood a beautiful chocolate-y brown hue:


Within 24 hours, you can start walking on the deck (light traffic only is recommended) and by 72 hours, it’s fully cured. I worked on it a couple hours a day over a few days, working in the morning before it got too hot (and the bugs came out!), and it proved to be a really straightforward DIY project that I was able to complete all on my own. And here’s what it looked like afterward:


I love how professional the solid-color stain makes the deck look and how well it makes it blend in with the house.

A few days later, it rained and I was able to see the stain in action, making the water pool on the surface rather than soak into the wood itself:


Next project on the to-do list? Get some patio furniture so that we can sufficiently enjoy our new-to-us deck in style!

For more information about BEHR’s complete weatherproofing line of products, visit their website here. You can also find out about all of their paint products (including interior and exterior paints) here, or you can follow them on Twitter or Facebook.
READ FULL POST >>
Previous Post
Related Posts Plugin for WordPress, Blogger...