Sale Shopping at the Grocery Store and a Giveaway to Win a $25 Gift Card to Kroger


If it seems like your neighborhood Kroger is always running a sale, that's because that's pretty much the case! Whenever I'm at a Kroger, I always make sure to browse a few sections of the store to see if there are any surprise mark downs (especially in the Nature's Market section) that weren't advertised that I can snap up. Love those little yellow shelf tags!

Well, it should come as no surprise but for the next few weeks, the Kroger family of stores (including Ralph's, Dillon's and more) is running one of their Cart Buster Savings Events, where tons of products (spanning more than 60 categories of items, including some from Cascadian Farms, Tropicana and Stacy's) will be marked down.

On top of that, though, from today through March 6, they will be featuring Deal of the Day offers, where you'll be able to find savings on a specific item already included in the Cart Buster sale marked down even further—up to and, in some cases, over half off. Each offer will be exclusive and available for one day only. (Find out more about both savings events here.)

giveaway to win a $25 gift card to kroger

In celebration of the extra savings available during the Cart Buster event and Deal of the Day going on now at Kroger, they are giving away a $25 gift card to one Life Blessons reader, good at any Kroger or Kroger-brand store.

There are up to three ways to enter this giveaway:
  • Leave a comment letting me know what you would use the gift card to purchase if you end up winning? (Plus, my favorite answer to this question will win five extra entries into the giveaway, so be creative!)
  • "Like" both Life Blessons and Kroger on Facebook. Please leave one comment and include your first name and last initial for verification purposes.
  • Follow both Life Blessons and Kroger on Twitter. Please leave one comment and include your Twitter username for verification purposes.
Please leave a separate comment (up to three total) for each action you complete, along with all requested information. (Entries that do not follow the rules or cannot be verified will be disregarded.) A winner will be randomly selected and contacted via email, so please make sure to include your email address if it is not linked in your profile. The winner will have 24 hours to respond with their mailing address, and the sponsor will mail the gift card directly. Giveaway is open to US residents, 18+. The Kroger Family of Stores gift card, information, and giveaway were all provided by the Kroger Family of Stores and General Mills/Nestle/Proctor & Gamble/Pepsi/Kraft through MyBlogSpark.
READ FULL POST >>

What I Do to Try to Get Readers to Stick Around & Engage With My Blog

Last week, I talked about how I find new readers for my blog. This week, I'll be looking at the next step in that process, which is:

"HOW DO YOU GET READERS TO ENGAGE WITH YOUR BLOG AND STICK AROUND?"

This is a tricky one.

Think about, for instance, how many blogs you read. How many do you come back to you or just visit once? And of the ones you come back to, how often do you comment on them?

For me, I read a couple dozen (and there are TONS of blogs out there) and comment maybe on one or two a day—max. And usually the ones I comment on are the ones of my real-life friends. I hardly ever comment on strangers’ blogs.

I heard once that with direct mail (ie, junk mail), if two percent of people who get the mail act on it, that is considered a successful campaign. Two percent! That’s next to nothing and yet that’s considered successful.

I try to keep that in mind when I am blogging, that it’s only natural that you are only going to hear from a very small fraction of people who read your blog. It’s not something to get discouraged over, because that’s just kinda the way it is in blogging!

The only thing I think you can do, then, is try to make it easy for people to engage with your blog, to click around and find other posts, to dig deeper into your archives. Hopefully once they drill down into your content, they’ll realize that your blog is super special enough to subscribe to and stick around.

So, that's why I have a related posts widget below every entry (available from LinkWithin) and why I always hyperlink similar posts when possible in my blog. I also have a navigational menu at the top which can help point people to subject-specific posts. Plus, on the few posts I have that get lots and lots of visitors (usually via Pinterest), I make sure to include a little blurb that points readers to other posts on the blog (such as “read more of my crafts here”) and to the archives. (You can see an example of that here.)

I also make it a point to try to respond to most of the comments I get, because I feel like if people know that I care enough to reply, they’ll be more encouraged to comment in the first place.

Sometimes, if the post merits it, I’ll ask a question at the end of the post for readers to chime in on—like when I posted my review of the study Bible I use and asked what kind of study Bibles you like to use. That got a good bit of conversation going!

Do what you can to help people drill in to your content, and I think that you’ll find that they’ll be more likely to stick around once they have had a taste of your blog. And don’t forget that even a small amount of interaction is worth celebrating!

This post is part of my Better Blogging series, where I respond to some of the most common questions that I receive about blogging. Feel free to read all of the posts in this series here.

Related Posts
Blog Housekeeping Update: My New Navigation Menu 
5 Recommended Resources for Revamping Your Blog Design
READ FULL POST >>

It’s Feeling Warmer In Here, Already…

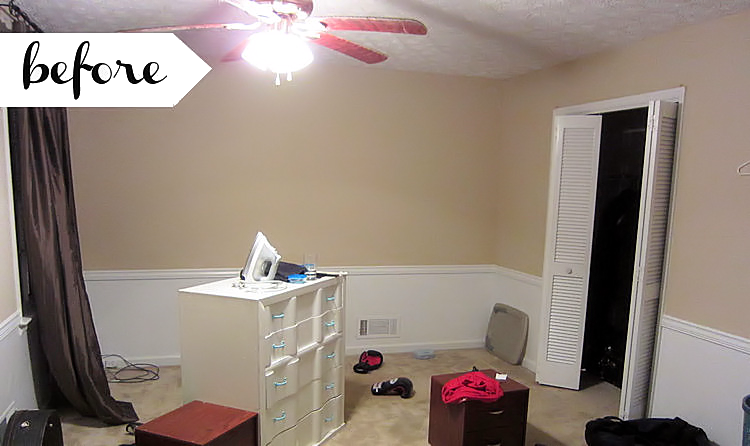
Having lived in apartment after apartment where the air has poured out windows and cracks and crevices like water from a pitcher, leaving us drafty and cold in the winter and cranking up the air in the summer, we knew that one thing we wanted to do when we finally got a house was to properly insulate it.

Even before we were dreaming up paint colors and furniture arrangements, we were researching ways to weatherize our home to make it more energy-efficient for the changing seasons. One of the surprising things I learned was that, while we think that a lot of insulation has to happen in the ceilings and walls, your windows, doors and even your light switches can add up to a significant amount of lost air if not properly insulated.


This pie chart from The Sierra Club divvys up where most houses experience air leaks and doors and windows are more than 20 percent. The typical hotspots for insulation--attic, floors and walls—add up to about 30 percent of air loss. But if you look at the costs of insulating, you’ll see that patching up your leaky windows and doors is a no-brainer: To insulate a small attic will cost hundreds, but to add weather-stripping to your windows, doors and fixtures? You can probably accomplish it well under $100.

While we do plan on adding insulation to the attic, we decided that the first order of business would be to attack these other air leaks, first, thanks to Duck brand, who sent me a variety of winterization products to use to shore our new house up against the elements.

The first thing you need to do is figure out where you’re experiencing leaks. I found that it was easiest to locate those leaks when there was a big storm going on outside with strong winds. I just walked around from room to room and stood in front of the windows and doors and used Post-Its to mark where there were drafts. Then, I rounded up some supplies and went to work.

Many doors have little gaps running all around them that let air stream out. To stop that, you can pick up a door weatherization kit that has rubber on one side and an adhesive on the other that attaches to the door jamb. (Did you know that’s what the part around the door is called? The things you learn when you buy a home!) All you need are scissors to cut the rubber to size and then adhere. Pretty simple, and the one from Duck is guaranteed to last 10 years!


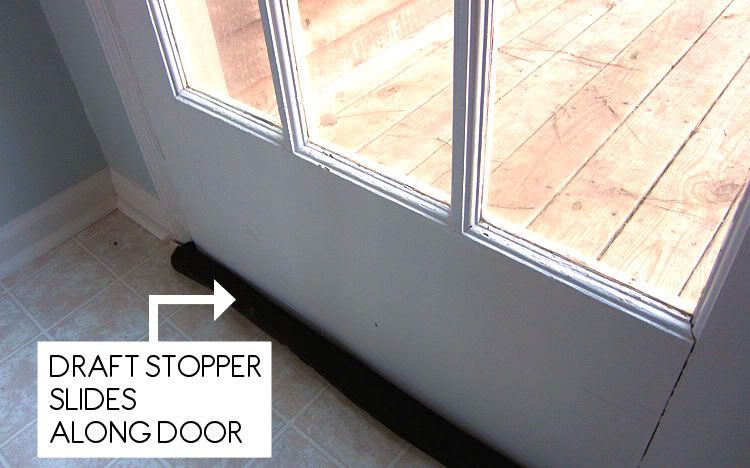
However, the door to our deck has an extra-large gap along the bottom, which we fixed up using a draft stopper from Duck that slips around the bottom of the door like a glove. Though it is obviously noticeable, I loved the simplicity of this solution! For instance, it is almost foolproof to use, doesn’t require any additional adjustments (it slides with the door), and also can be removed and reused any time you move or need it in a different location. Plus, you can also print out a coupon for the draft stoppers.

With the doors better sealed, then we moved on to the windows. Fortunately, the previous owners left storm windows on almost all of the house’s windows, which is a great first step to cutting down air loss. But if you don’t have those (or for even more added protection), you can turn to old-fashioned window plastic , which is barely noticeable and incredibly easy to apply, thanks to the pre-taped sheets that come with the roll-on kit from Duck. (You can also download a coupon for this kit.)


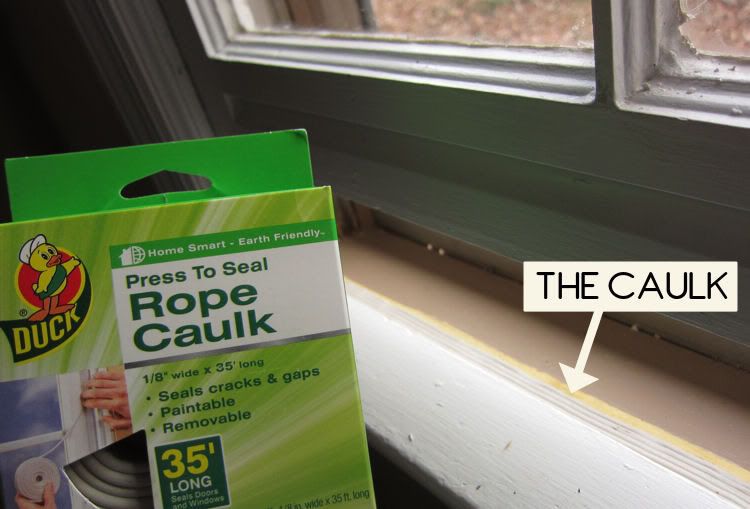
One of my favorite fixes for the windows was the rope caulk they sent, which requires absolutely no tools whatsoever. You just open the package, unroll a length of moldable caulk, push it into place along the edge where air is leaking, and you’re done. You can stretch it or double it up depending on the thickness your window needs, which I really liked. Plus, it seems really sturdy and is paintable and removable—making it a solution that will fit any number of living situations. (I found that it's best to use along the bottom of a drafty window, like how I used it, where there isn't much friction against it.)

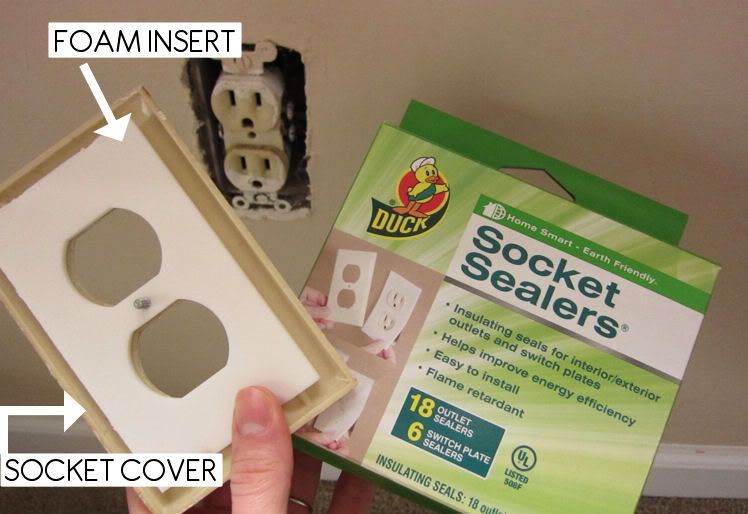
And, while windows and doors are some biggies for losing heat, there are also a lot of surprising little ways heat escapes. Like through your wall sockets. (Just check out the picture below to see all that open space that sits behind the cover and can let outside air seep in.) According to the Sierra Club pie-chart, it only accounts for about 2 percent of loss, but it’s a pretty easy fix by popping in pieces of pre-cut foam that fit beneath the wall covers. It only took me about a half an hour to go around the house and add the inserts to all the sockets and switches along our exterior walls (where the loss is the greatest). And I still have extra inserts left over from a single package!


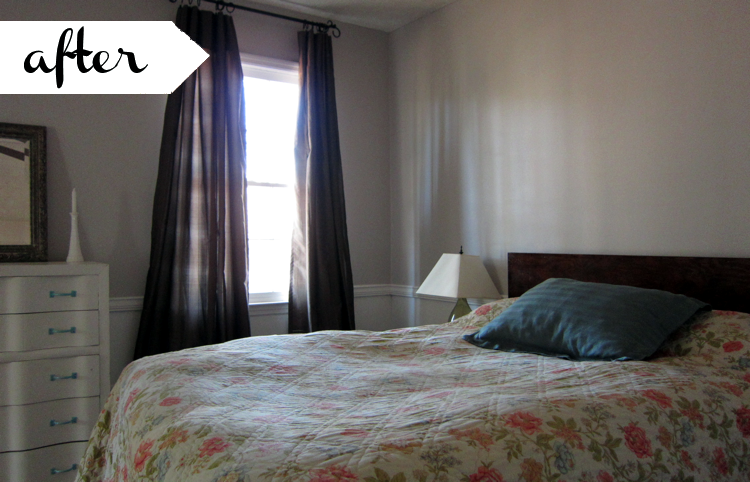
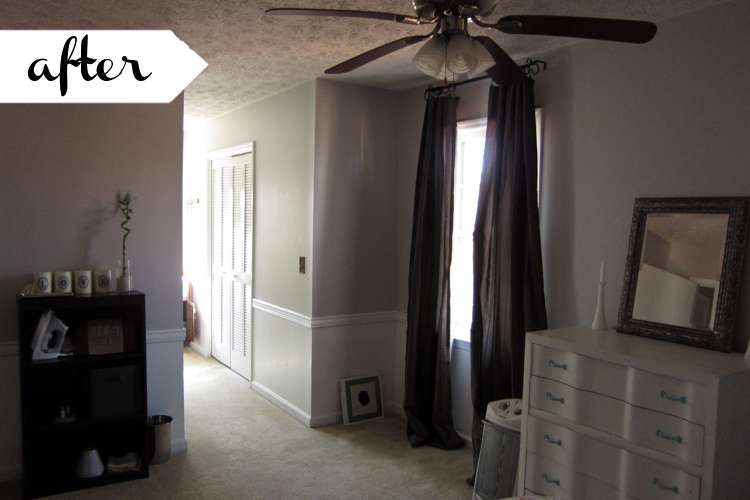
All in all, they were really simple swaps to help make our new home more energy efficient. And aside from the plastic window coverings, all of those changes are durable and should last for years before having to be replaced. Saving time, money and a little bit of Mother Nature, too? That’s my kind of home-improvement project!

To find out more about weatherization products from Duck, visit their site here. You can also "like" them on Facebook or follow them on Twitter for their latest updates.

Related Posts
Getting a Little Taste of Home Ownership 
A Prayer for a “Humble but Sturdy” Home
READ FULL POST >>

Decorating with Homemade Billy Ball Flowers: A Tutorial to Make Your Own


Billy ball flowers. You may not know that’s what they’re called, but if you’ve seen almost any decorating blog or magazine, you’ve probably noticed them. They’re those little yellow, ball-like flowers that festoon nearly every fashionable abode this side of the Atlantic. (The more scientific moniker for them is Craspedia.)

This is what they look like, naturally >>>

I admit that I’ve jumped on the Billy bandwagon as well, but of course, only by giving it my own spin.

When I was doing some decorating in our newly painted bedroom, I had a couple of extra, matching milk-glass vases that didn’t fit our living room mantle, where the rest of the collection is housed. So I decided to perch them in here. At first I fitted them with candles but decided that made it feel like a candelabra in some medieval parlor somewhere.

No, I wanted some flowers and the Billy ball variety seemed like a perfect fit.

Since I spend a chunk of the day without a car (click here to read more about why we only own one car), I decided to see if I could make my own version without having to leave home and scour the fake-flower department at Hobby Lobby. I considered it an exercise in resourcefulness and creativity.

So it was.

As I pondered the idea, I remembered all the prickly seed pods that littered our yard. I did some research and they’re from the sweet gum tree which is prevalent all over the south. (When I lived in Ohio, I don’t remember seeing the pods as often. But they’re everywhere down here.)

On my walk exploring our yard, I picked up a couple dozen and then went to work, turning them into my own Billy balls for a decidedly homegrown arrangement with just a little bit of paint, glue and patience.

Within a day or two, I had a bouquet that I clustered into the vases and proudly showed off on our bedroom dresser:


(You can see some pictures of our redecorated master bedroom here.)

And, for the curious, here’s how I made them:


1. Gather about two dozen dried sweet gum seed pods that still have a stem on them. Alternatively, if you live somewhere without these, you can try using any other round-shaped object. I’ve seen other tutorials that make use of small Styrofoam balls or felted yarn. Use your imagination!

2. While you’re outside, also gather about two dozen small sticks. Pick a variety of straight ones and some with forked branches or curves to them.

3. Paint each pod with a mustard yellow color, holding on to the stem so that you can get all the angles. (I used regular wall paint because that’s what I had on hand, but you can always try spraypaint or craft paint and see how those work.) Let the painted pods dry for a few hours, until they’re dry to the touch.

4. Once the paint has dried, use some scissors to cut the stem off the pod.

5. Using a sturdy craft glue like Aleene’s tacky glue, dip the tip of one stick into the glue until there’s a good-sized glop on it.

6. Locate where the stem originally was or a spot on the pod where you weren’t able to get fully covered by paint. Push the stick into this crevice, and lay on a flat surface propped up so that it dries in place. Let the stick-and-pod dry overnight.

7. In the morning, they should be completely dry and ready to be arranged in a vase of your choosing. Enjoy!

P.S. If you like this tutorial, please click here to pin it to Pinterest! You can also follow me on Pinterest here.

Related Posts
The Beauty Within My Own Backyard 
Making My Own Artwork: My Travel Map Craft Project
READ FULL POST >>

Upon Discovering a Mouse in the House…


Turns out we have a mouse in our house. Yes, a mouse. Just like in the Dr. Suess book. Who knows, maybe even mice.

I had noticed soon after we moved in and I’d put everything in place in the kitchen that under the sink were some little black seed-looking things. At first, I thought it was dirt dropping off of the brush-and-dust pan I kept under there.

I cleaned it up, but a week or so later, noticed some more. This time, I made sure that I removed all of them, to see if they’d come back again.

By now I was thinking they were eggs from some kind of bug or something. Within a week or so again, there were more. So I went online and started doing some searching, typing in, "found small black seed dots in kitchen" and similarly ambiguous descriptions like that.

Lo and behold, someone had posed the same kind of question on some forum and dozens of responses chimed in, "Mouse droppings!"

My jaw dropped and I was immediately gripped by the heebie jeebies. What I thought were seeds were actually…droppings?! From a mouse?! Ew.

It’s not that I’ve never seen a mouse before. Once when I still lived at home, my sister and I were baking cookies of some sort—fortune cookies, maybe—in the kitchen and we saw a mouse scamper across the counter. We screamed bloody murder, somehow managed to trap it and then I think let my mom deal with it when she got home.

Even at our old apartment we had a squirrel—yes, a small, acorn-eating, fluffy-tailed squirrel—sneak into our apartment which we chased down—oven mitts and all—to shoo out the front door. (Read more about that adventure here.)

But those were both one-time things. No, this time, it’s obvious that the critter has been here so often that it knows its way around the place, leaving a trail, as it were.

My online-search suspicions were confirmed the following night when I was sitting on the couch in our living room and all of a sudden a small brown (admittedly, kind of cute) mouse darted from the fireplace across the living room and disappeared in the kitchen. By the time I got in there, it was gone. It knew where it was going.

Now, I know we live in the woods. I know our house is older so there are likely to be quite a few side doors for the little critters to enter in. It’s not that we’re dirty or cluttery or leave cheese sitting out on the counter.

But part of me is embarrassed to admit that there is a little mouse who considers this his house as much as we do. Part of me feels like if we were doing this home-ownership thing right, the mice would turn around and march right out, tipping their hats and waving goodbye as they go.

Of course that’s absurd.

But isn’t that how we think, sometimes? That if I was better or more prepared or more whatever, then I wouldn’t have to deal with this problem. Sure, sometimes that’s the case. But sometimes—it’s not. Sometimes there’s a problem and you simply have to deal with it.

Did we hollow out those holes into our house? No. Did we empty out a mouse-sized crevice and invite him in? No. Those things already existed and now, we simply have to deal with them. Sometimes, that’s just the way it is.

(But truth be told, it’s enough to make me want to get a cat.)

Related Posts
When a Squirrel Sneaked Into Our Apartment...
Getting a Little Taste of Home Ownership
READ FULL POST >>

How I Find New Readers for My Blog

One blogging question that I have received from a few readers is:

"HOW DO YOU FIND READERS FOR YOUR BLOG?"

Now, I am no professional blogging marketer or businesswoman. I am just a regular person who started a blog and am learning as I go and DIY-ing all of it myself. So as far as attracting new readers to my blog, that has been very much a trial-and-error process for me.

There are lots of different ways to approach doing this, whether it’s guest posting, joining blog networks, taking advantage of social media, advertising on other like-minded blogs (which I’ve never done), etc. They’re all good ways to get the word out about your blog but I don’t think that any one of them, on its own, is going to be a magic bullet.

Instead, I think I’ve benefitted most from the cumulative effect of implementing a variety of approaches. And I think that’s true for most people.

One thing that I would suggest, before you even start trying to get the word out about your blog, is to set up some sort of tracking tool on your blog, such as Google Analytics or StatCounter, both of which I use to monitor my blog's traffic.

Once you are able to track where readers are coming from, you’ll know which of your approaches are generating the most hits. And then you can keep pursuing the most successful ones and scrap the ones that don’t work so well. I stopped doing a lot of blog link-ups because I discovered that they just weren’t worth it, as far as having new readers come to my blog and stick around. You want to be a good steward of your time!

When I first started out blogging, I sent out an email to my closest friends letting them know that I had started a blog and then I set up NetworkedBlogs app on my personal Facebook account to have my posts automatically post to my Facebook feed. When you’re starting from scratch, don’t be afraid to tap your friends and family to come read along! (By the way, don't forget to "like" Life Blessons while you're on Facebook!)

You can also check out blogging networks and cross-post your entries there. One that I like is 20sb.net, which is a blogging network for twentysomethings. They have lots of different forums and boards that you can post on and share your latest posts.

Another thing that I occasionally do that has garnered a small-but-decent amount of traffic is to periodically comment on blog posts of larger blogs. (Of course it should go without saying that any comment should be adding value to the discussion and not be completely self-seeking. People can see through that and will be less likely to click through.)

However, I’ve had the most luck attracting visitors by getting other, larger blogs and websites to link to posts previously published on my blog. For instance, I have submitted some of my craft and recipe posts to TotallyTutorials.com and MoneySavingMom.com and received tons of traffic from them. A plus from that has been that a lot of those posts have also ended up getting circulated on Pinterest, generating even more traffic. I've also been invited to submit my blog posts to a couple of larger media sites (most recently to Crosswalk.com), and those have been great boosts to my traffic.

Surprisingly, I haven't had near as much luck attracting visitors by writing guest posts, even for some decent sized blogs. But, I always figure that I might as well give an outlet a try once and see how it does. Sometimes I'm pleasantly surprised and then I know I can try to submit posts there again in the future.

So I think try a little bit of everything and see what works for you—what generates the most traffic, as well as what you enjoy doing.

Because while it’s nice to have lots of readers, blogging is not just about the numbers. Compared to a lot of other blogs out there, I don’t have a ton of readers. But the ones that I do have (you!) are really involved with the blog, commenting and tweeting and emailing me. That is worth far more to me than a million readers any day!

This post is part of my Better Blogging series, where I respond to some of the most common questions that I receive about blogging. Feel free to read all of the posts in this series here.

Related Posts 
Your Questions Answered: Starting a Blog 
#101: A look back at my first 100 blog posts
READ FULL POST >>

Make Your Own Tomato Salsa Recipe


Tacos have always been a mealtime staple around here, even from the earliest days of our marriage, usually making a weekly appearance on our dining room table.

With that much use, buying jar after jar of salsa can start to get a little expensive, so I quickly added it to my make-it-yourself to-do list to find a good salsa recipe that I could make at home. There were a couple salsa recipe fails, but this one has been a keeper.


The lovely thing about it is that it is so super simple, you can make it in the winter (when grocery-store tomatoes are less than appealing) and it makes a bunch of salsa all at once, so I only have to whip this up once a month or so. (I store them in smaller jars and stick the extras in the freezer until I’m ready to use them. Tastes just as good thawed as it does fresh!)


I favor sauce-y salsas (try saying that three times fast), as opposed to purist ones that are just chunks of tomatoes with some herbs thrown in, so if you’re of like mind, then this is the perfect salsa for you, too: It’s thick, smooth and the way I make it, it’s pretty mild, but you can easily heat it up by adding more peppers and spices.

Take your tongue for a tango, and try this Saucy Salsa.


1 28-ounce can of tomatoes *
1 8-ounce can of tomato sauce
1 6-ounce can of tomato paste
1 ¼ cup onions, diced
¾ cup green peppers, diced
½ cup jalapeno peppers, diced (about 2 peppers)
¼ cup sugar
3 garlic cloves
1 Tbsp. salt
1 tsp. cumin
1 tsp. pepper

Mix all ingredients together in a 2-quart saucepan, and bring to a slow boil. Remove from heat and let cool before transferring to containers. Store in fridge for about a month or in the freezer for longer periods of time.

* I like to use diced tomatoes if I want it a little chunkier or crushed tomatoes if I want a smoother salsa. Both are tasty, but if you use diced, you might want to drain some of the water from the can first, so that your sauce doesn't get too runny. You can always add it back in to get to the consistency you like.

P.S. If you like this recipe, click here to pin it to Pinterest. You can also follow me on Pinterest here.

Related Posts
Make Your Own Pizza Sauce 
Homemade Hummus Recipe 
Recipe for Raspberry Vinaigrette Dressing
READ FULL POST >>

Where I Spend Most of My Time: A Peek into My Home Office


Since my official occupation is that of a freelance writer, I was so excited to finally get to have a dedicated office when we bought this house.

For the past two and a half years, while I’ve been a full-time freelancer, I had worked with my laptop propped up on a sturdy card table that I’d spraypainted a light pistachio color. That was eight years ago, when I took an internship in Birmingham, Alabama and needed to fit all my furniture in my parents’ van.

Needless to say, it was time for an upgrade.

Here’s what my “office” looked like in our last apartment:


It was squished into a corner of our living room, where you had be to careful as you turned around because my chair would sometimes hit against the stereo that teetered just behind the set-up and turn it off or on. (You can see more pictures of that old office set-up here.)

With our new house, though, came two extra bedrooms. One of which we are using as a guest bedroom (can’t wait to show you that one soon!) and the other as an office.

This, my friends, is where I spend way too much time:


We looked at a lot of different options for building our desks and I had a few qualifications it had to meet:

1. I wanted me and my husband to have our own desks. While sharing has worked for the past couple of years, it was time for my husband to have his own spot so that he didn’t have to worry about me always moving and “organizing” his piles. I think he’s much happier about this setup!

2. With that, I was adamant that our desks match. My husband didn’t think this was all that important but for some reason, it was a biggie for me.

3. I also wanted to get away from the desks-facing-the-walls setup that I’ve always had. Who wants to stare at a wall, when you can look out a window? Or even across the table at your spouse? That’s more my kind of scenery!

4. Storage. I wanted as much as I could get. No more wasted space below the tabletop. Give me drawers!

After doing a ton of research and setting aside a pretty big budget for our desks, we ended up going with this build-your-own setup from IKEA, which cost less than half of what we were prepared to spend. Don’t you love when that happens?!

They had two different options you could choose for the storage components and we decided to pick one of each, to allow ourselves some room to mix things up. We also went with a larger tabletop that gives us plenty of room to spread out, make piles and still have space leftover. Welcome to the lap of luxury!


The last piece of the puzzle was finding a new comfy desk chair, since the old one we’d been using had not been very good for my back. (Since my husband isn’t at his desk near as much as I am, he’s using the old one and hasn’t had any problems.) I ended up getting the opportunity to pick out anything from Wayfair.com’s extensive selection of items for the home and found this ergonomic chair that comes in a handful of colors, of which I chose the charcoal gray.

And I love it! I love that it’s not your standard issue black and the heathered gray lends a sophisticated feel. Plus, you can adjust the chair’s height and tilt. I haven’t had any back or neck issues since switching chairs! I’d love to upgrade and get another one for my husband, too. (Matching, of course!)

I still haven’t done much wall decorating (save for tacking up calendars, hanging a clock and our budgeting corkboard), but for now, I couldn’t be happier with this workspace of mine!

(Plus, if you're looking to set up your office, you can also use Lenovo promotional codes to help save on computers and components.)

Related Posts
An Epiphany About Reorganizing
Thoughts on Having Too Many Ideas for My Own Good 
READ FULL POST >>

Making My Marriage Stronger With a Fresh Coat of Paint


The past month has been a crash course in getting to know this little house of ours. I’ve found myself running to my computer to look up things like:
How to fix a broken window pane
How to add a deadbolt to a door
What kind of paint rollers to buy
How to insulate your water pipes
How to fix a doorbell
And so, so much more.

While at times it’s been admittedly frustrating and taxing and overwhelming and days have ended where I wonder if I could feel any more sore, it’s also been invigorating to realize all that has been accomplished—and with my own two hands, no less.

Slowly but surely, this humble abode is taking shape and growing stronger by the day, as project after project gets crossed off the list.

And we’ve learned so much in the process. Not only about our house itself or how to fix those problems, but also about ourselves.

I remember when my husband and I were first married and we bought our disassembled bookshelves and went to work building them in our living room. It was one of our first projects together as a married couple. And it was filled with frustrations as pieces didn’t fit together and directions were lost in translation. We had to take a break halfway through because not only was the furniture not coming together, but neither were we as a couple.

We’ve come far since those early days, learning to use softer, kinder words; to be more patient; to not get too caught up in the stuff that doesn’t matter.

We’ve become more of a team, working together on these projects. Because it’s more than just a home we’re working on. With every swing of the hammer or swipe of the paint brush, we’re also working on our relationship as we seize opportunities to practice grace and humility and kindness and compassion and understanding.

On their own, they might matter very little—a screw gets lost, which hue to choose, whether to put the table here or there. But when they’re seen in the light of cultivating opportunities to feed and foster our friendship, chances to plant another seed of love into our marriage, they are ripe with potential and possibility.

So I look around me, at our like-new window and our freshly painted walls, and I smile. Because there's so much more at work here than meets the eye...

Related Posts
That Which Sanctifies Us in Marriage
Who Are You Complaining To? 
READ FULL POST >>

My Advice About How to Improve Your Writing For Your Blog


One question I commonly get asked about my blog is:

"HOW DO YOU IMPROVE YOUR WRITING, & WHERE DO YOU GET IDEAS FOR POSTS?"

I should be upfront here and tell you all that I majored in magazine writing in college. I went to school already head-over-heels in love with words and writing and was passionate enough at 18 to want to dedicate my life to learning about ellipses and emdashes and poetic embellishment.

So, I have had some practice when it comes to writing. That gave me an obvious head start when it came to starting my blog, but there’s no reason to think that you have to have a degree to be a good writer. Not at all.

When someone asks me about how I cultivate my writing on my blog, I look at blog writing as having two distinct aspects:

First, it’s how you tell stories (the words you use, the phrases, imagery, etc.). Secondly, it’s what you tell stories about (more like the plot-line of the posts, what is the big picture of the post?).

Both of those aspects come into play when I’m trying to hone and sharpen my writing.

For the first, I think the key to creating posts that are well-written in a close-up sort of way is simply by reading good writing. I think writing classes are great, but I will tell you that I went to journalism school and I learned much more by reading my classmate's pieces than I ever did by listening to the professors teach.

So find some blogs or books or even magazines that are filled with words that captivate you just as much as the story they’re telling. Read them over and over again. What is it that you like about them? Try working some of those aspects or ideas into your own writing.

For the second element, the crafting of post ideas, I think the best thing for me is to always be looking all around me—everywhere—for post ideas. Because the truth is that there’s the potential for a story hidden in every moment, every scene, every emotion. It’s a matter of plying it out and sharing what’s special about it.

You could make a practice of this. Like when you’re doing something mundane (for instance, prepping a meal), think about how you could turn that into a blog post. I did that recently with my Confessions in Homemaking about meal planning, when I took something ordinary—the fact that I stopped planning meals out in advance—and used it as a launching board to encourage women that we do not have to be perfect when it comes to our homes.

But it’s not just the things that I witness—say, what I had for breakfast or where I spent my weekend. No, it’s even the thoughts I was thinking as I read a Bible story or the fears that crept up on me as I was washing the dishes or the things I wish I would have said to so-and-so.

When we start tapping into life in its entirety, that’s where inspiration knows no bounds.

Finally, write, write, write. Nothing is going to make you a better writer than writing.

Whenever a blog post idea hits me—and as I just mentioned, I’ve trained myself to always be on the lookout for ideas—I try to start writing it immediately so that I can get it down on paper.

And then, I let it sit and come back to it again and read it with fresh eyes. It’s very likely that every post that you’ve read on my blog has been read and edited by me at least two or three times (sometimes even more). Every. Single. One.

Good writing is not something that just pours out of a pen or tumbles out onto a computer screen. It is a matter of finessing the work, playing with words, rearranging ideas, adding more depth, deleting tangents, being brave enough to bare more of yourself.

The most important thing? Keep writing!

This post is part of my Better Blogging series, where I respond to some of the most common questions that I receive about blogging. Feel free to read all of the posts in this series here.

Related Posts
Why I Love Keeping Lists
Thoughts on Having Too Many Ideas for My Own Good
READ FULL POST >>

Why We Can’t Give Up…


You know the saying, "Can’t see the forest for the trees."

I recently realized I think that it’s all too often that we do that with our reading of the Scriptures.

The last book that I read in my chronological Bible reading plan last year was Revelation. It’s a book that is hard to wrap your head around, to understand all the plagues and bowls and lampstands and locusts. It’s a book where we can get hung up on these mysteries and symbolisms and wonderland-like images and miss the bigger point that is going on in the story.

I’ve always thought Revelation was about the Antichrist and Armageddon and the end of the world as we know it. And it is.

But as I read through it this last time, I realized it’s about much more than that.

In the beginning of the book, John delivers messages to seven churches in Asia, from Ephesus to Laodicea. In these messages, he urges them to love and obey God passionately, to press on despite persecution, to pursue peace and serve one another selflessly, to stay away from evil and to keep the faith.

After these letters, he launches into his great revelation that talks about what lies ahead for the earth and everyone in it, how Christ will come again and redeem it from all evil and usher in the kingdom of heaven and all the perfection that comes with it. It’s in this portion that we read about all the supernatural episodes of dragons and beasts and bottomless pits, of wedding feasts and white robes of linen.

For the most part, I’ve always thought of Revelation as being divided into two; the letters being separate from John’s revelation.

I was listening to a Misty Edwards song (which you can download for free here) where she sings, “Don’t give up. Don’t give in. If you don’t quit, you'll win. You’ll win! 'Cause everything is in my hands. It’s going to be alright, going to be okay. Just don’t give up…”

As I listened to those words, I realized that I think that’s the same message that John was trying to tell his readers. In his letters, he told them not to give up, to keep trusting the Lord. But he takes that one step further through the revelation, where he reminds them why they need to keep holding on: Because everything is going to be okay.

Through the revelation, he tells them that Christ is going to come back and redeem everything. God has not forgotten about the suffering of his people. He holds it all in his hands and is going to make it right. He is going to rescue his people and they will finally get to enjoy the peace and the perfection that he has promised them from the beginning.

Scholars can argue back and forth about the meaning of the numbers and the images and the years that are described through the pages of this book. They can argue whether it’s all literal or poetic or something in between. They can get hung up on the details and miss the bigger point that is going on here.

We must not give up. This world is going to be trying and there are going to be days that are difficult. But we must keep holding on to our faith because if we do, we’ll see that God is going to turn it all around in the end. We must cling to that promise and trust that we will get to see the fruits of his victory when the time comes.

Until then, we must not give up.

Related Posts
Lessons from Reading Through the Prophets
A Morning Prayer to Start Today
READ FULL POST >>

Adventures in Trying New Foods: Kale Update


At the beginning of the year, I announced that a resolution I wanted to make was to try a different food each month. Just one a month, to force myself to experiment with new ingredients.

In January, that ingredient of the month was kale. (You can see the whole line-up of foods I want to try over the course of the year here.)

Truth be told, I wasn’t really looking forward to this. But then if I was, I probably would have tried kale already, rather than having to force myself to cook with it! I knew all the health claims about it and wanted to work at fitting more of it into my diet instead of always defaulting to spinach.

So, I started by searching Pinterest for recipes that use kale. (Here's the pinboard I'm using to collect all the recipes I'd like to try with these new-to-me ingredients.) I gathered a couple that sounded good and picked up one bunch at the grocery store.

The first recipe on my list was a kale pesto. I’m a huge fan of pesto and so I couldn’t really resist.

One of the neat things about this resolution of mine is that in forcing myself to try one new ingredient, inevitably, I’m going to end up trying other new ones, too. Because the recipe for the pesto also called for pine nuts and shallots, which I’d never purchased before, either. So with one shot, I ended up cooking with not one but three new ingredients!

The kale pesto turned out pretty well, so much so that I actually transferred it from a scrap piece of paper to a formal index-card, tucked into my recipe box. My husband suggested it would make a great dip, like a grown-up alternative to our salsa standby.

I tried another recipe on my list (kale and red pepper pasta) but didn’t think it was all that impressive. There was another kale recipe I’d saved—yam and kale salad—but I didn’t have the guts to try it. So I ended up using the last of the kale to make another round of the pesto, which I froze so that we can defrost it for a last-minute meal over pasta.

It wasn't a ton of experimenting, but it was enough to get me more accustomed to cooking with kale, and hopefully encourage me to do even more of it in the future.

Up next? In February, I’ll be trying out Brussels sprouts. (You can see the whole line-up of foods I want to try over the course of the year here.) If you’ve got any good recipes for those little guys, I’d love to know. I’ll update you on how that one goes next month!

Related Posts
Learning to Cook: An Art I Neglected for 26 Years
A New Years Resolution: Adventures in Trying New Foods 
READ FULL POST >>

The Beauty Within My Own Backyard


Now that it has been warming up outside, I've started spending more time getting to know this new yard of mine. (We bought a new house in November. Read more about that here and see sneak-peeks of the interior when we first bought it here.)

The other day, I walked around the yard, looking closely at all the flora and fauna tucked into the yard's nooks and crannies. And I found myself in awe at all the surprises that I found as I wandered and looked closely at my new stomping grounds.

With camera in hand, I snapped some photos of the things I found as spring creeps into this yard of ours.

Here are some of the jewels that caught my eye:


And of course, I couldn't resist bringing some of that beauty indoors:


I can't wait for the rest of springtime to unfurl and see what changes the warmer weather brings to this yard of ours.

Related Posts
Buying beauty for 99 cents... 
Starting a Container Vegetable Garden
READ FULL POST >>

6 Tips to Improve Your Blog


One question that I have received from a few readers who blog is:

"HOW CAN I IMPROVE MY BLOG?"

The thing with that question, though, is that I can’t visit every blog to offer advice for improving your blog. And even if I could, I wouldn’t. Because I don’t see my job as that of being a blog critic of anyone else’s blog than my own.

But what I can—and will—do is share some of the key things that I’ve done with my own blog that I think have been vital to making my blog as successful as it has become:

Write ahead. This is one of the things that I think has kept my blog going for as long as it has (two years and counting!). When I first started, I spent the first month writing posts—before I ever even launched the blog. That gave me a nice accumulation of posts ready to go in my draft folder, and I’ve kept up that practice to this very day. Because, if you’re anything like me, inspiration will strike all at once and I can spend an entire evening writing out post after post. But then, a week later, I haven’t had any ideas worth pursuing and haven’t written a word since. But because I have a folder full of ideas, I can always have something fresh on my blog, even if it’s something I wrote a day ago, a week ago or even a month ago.

Post content frequently. I’ve made it an effort to post at least every other day. Because I work and write ahead, this is a frequency that I can keep up with. But even if you can’t post that often, it’s important to keep some kind of rhythm that readers can come to expect, which will encourage them to bookmark your site and keep coming back.

Take time to respond to comments and emails. So much of blogging is measured by how many comments you receive. If people are going to take the time to leave me a comment, I think it’s only deserving that I take the time to respond back. I don’t respond to every single one (especially short ones that are a simple “Thanks,” even though I do greatly appreciate those). But if someone asks a question or adds something new to the conversation, I think it’s simple courtesy to respond to them (via another comment or email, if you have it). Plus, doing so not only can give them a sense of being “heard’ but also encourage them to come back and leave comments in the future.

Include photographs with your posts. When I was in journalism school, one of the things we learned was that, in writing, a picture really is worth a thousand words: People are far more likely to read a news article that has an image attached than one that’s just a headline and a string of words. On the internet, that is even moreso, which is why I make an effort to search out captivating pictures to accompany my writing, to encourage folks to go on and read the entire piece. When you do include images that are not your own, make sure you credit them with a link back to the source. I like to use WeHeartIt.com to find a lot of the images that I haven't personally photographed.

Don’t be afraid to tweak your blog and try something new. By nature I’m a perfectionist, so I’m constantly tweaking things, even here at my blog. If there’s something that bothers me, I’ll research and play with different solutions until I find something that works. Sometimes that means that I spend an entire night figuring out how to integrate social media buttons into my posts and then give up because I don’t find anything that I like well enough. (Which has totally been the case, as of late.) But sometimes that means that I spend an extra hour trying out different fonts for my sidebar headers and then, finally, I find one that I love. I usually implement these little changes and updates as I go, rather than waiting to do a complete reveal with lots of changes all at once. I’ve found that little changes over a long period of time add up to a lot of impact.

Pray for inspiration. There have been times where I’ve experienced a substantial drought of ideas and felt like I have absolutely nothing to say. Last March, when my husband and I moved into a new apartment, I had zilch when it came to my blog. That resulted in 7 total posts for the entire month, whereas I typically publish at least twice that. I had drained my reserve of drafts and was more consumed with unpacking than posting. So instead of giving up on the blog, I started praying for inspiration about blog posts. Because I believe that God cares about the big things in our lives (salvation, spouses, safety) but also the little things (like what I’m going to feature on my blog). So I prayed and continue to pray about what to write on my blog, and I don’t think I’ve had a dry spell like that ever since. Don’t ever think for one second that God doesn’t care about your blog. He cares about you, and so he consequently cares about what you care about, too.

This post is part of my Better Blogging series, where I respond to some of the most common questions that I receive about blogging. Feel free to read all of the posts in this series here.

Related Posts 
Answering Your Questions: Blog Design
Answering Your Questions: Blog Layout 
READ FULL POST >>

Better Blogging: A New Series at Life Blessons

I’ve been blogging here at Life Blessons for more than two years, and over that time I’ve learned quite a bit about growing and tending this little patch of the internet. 

I guess all that effort—from learning more and more HTML to getting into a groove with my writing—is starting to show because lately, I’ve found myself fielding quite a few emails from readers with a variety of questions about my blogging techniques and my advice for other bloggers.

I thought that I’d take the time to address a lot of those questions and talk about a variety of blogging aspects over the next few weeks in a new series, Better Blogging.


But first, before we jump right in to all the new material about blogging, I wanted to remind you of all the blogging questions I’ve already answered in the past as well as some of the blogging resources I’ve shared before:

Some Blogging Basics

(You can find all of my blogging advice, tips and updates here.)

Do you have any other questions you'd like me to answer during this series? If so, please leave them in the comments.

Related Posts 
Why I Started This Blog 
Two Years Ago Today, I Started Life Blessons...
READ FULL POST >>

We Finished Painting the Bedroom!


Ahh. Can you hear that? It’s the sound of finally being able to sleep in my own bedroom!

After I shared about how we’d taken the time to prime the bedroom (more about that here) and then subsequently did—oh, you know—nothing in there for almost a month (and continued sleeping in the guest bedroom), the time had come to finish the task at hand. Sharing that update was enough to motivate me to finally do that.

And last weekend, I'm proud to report that I did.

While my husband was at work, I pulled on some old clothes, turned on some podcasts and went to work, rolling on the paint, filling in the corners and touching up the edges. I spent one whole evening painting on the first coat and then my husband helped me on his off day to put on the second.

We settled on a shade of gray for the room for one, simple reason: That was the color my husband suggested. And since he doesn’t normally have too strong of opinions when it comes to decorating, I saw no reason to protest.

We ended up selecting a soft, not-too-dark gray courtesy of Mythic Paint, a company known for creating quality, non-toxic paints. I’ve mentioned before that my husband is sensitive to paints and chemicals, so since we’d be spending a hefty amount of our time breathing in this room—eight hours a night—we wanted to use an option that was as friendly to our lungs as it was to our eyes.

Mythic Paint has created a reputation of creating paints that are safe for kids, pets and the Earth with zero VOCs, zero toxins, and zero carcinogens. Plus, they offer more than 1,200 paint colors to choose from, so there’s apt to be a shade for every project and personality!


After comparing dozens of paint chips, we finally settled on “Grey Rain.” (Check out all the gray hues we had to choose from!) Once it was on our walls, we couldn’t have been happier with our choice.

Here’s a reminder of what the room looked like before we painted it:


(Don’t you love how “before” pictures always end up being a mess like that?!)

Well, here’s a look at it once we painted it and moved our furniture into place:


Gone are the heavy, tan walls. In their place is a room that culls calm. Almost as soon as the paint was dry, my husband remarked how peaceful the paint made the room feel. It takes what could be a cold, sterile color and—with almost the lightest touch of lavender to it—gives the pale gray a softer edge, perfect for the soothing aesthetic we were going for.

Plus, we picked an eggshell finish for the paint, which is a pretty forgiving sheen that covers up a lot of the wall’s imperfections but still contains a slight luster that gives the room something of a glam feel. (It’s also supposed to hold up really well to cleaning and scrubbing, which makes it a good choice to consider for kid’s rooms or high-traffic areas.)

We still have yet to hang any artwork (I’m contemplating crafting up some new ideas!), but we’re one step closer to making this house feel more and more like home. (You can review all the updates about our new house here.)

Find out more about Mythic Paint’s high-quality, non-toxic paints, which include interior and exterior paints as well as primers, by visiting their website. You can also like them on Facebook or follow them on Twitter.

Related Posts
Fighting the Desire to Decorate to Perfection 
The Search for the Perfect Artwork
READ FULL POST >>
Next Post Previous Post
Related Posts Plugin for WordPress, Blogger...