The Mercy of Second Chances


When I lived in Grand Rapids I went to a boiler room a couple of times that was near my neighborhood. According to another website, "Boiler Rooms are engine rooms driving God’s purposes forward. The Boiler Room is a youth initiative seeking to establish a praying community." There are boiler rooms throughout the country and world, where groups of people come together to commune with God and seek him intimately and worship him and serve him.

To me, that is a beautiful picture. It makes my heart say 'yes,' to be there, to be a part of that.

Yet, I only went to this boiler room a couple of times the whole almost-year I lived there. No more than 5 times I'm sure. What was it that held me back? I know it to be fear. Fear of feeling left out. Fear of being the stranger. Fear of not being "Christian enough." Fear of not loving the poor enough. Fear of not loving the Lord enough.

I was intimidated and let that intimidation run me away from this radical community. I still subscribe to their blog and love to read about the inspiring ways they are rocking that community and reaching out and being the hands and feet of Jesus. And yet, I turned my back on that opportunity.

Still, the Lord is a redeemer. He redeemed through Jesus once and for all, and he continues to redeem us everyday.

So it was the case for me.

After living in Grand Rapids for a couple of months, I noticed a little blurb in our church bulletin for a prayer group that met on Wednesday nights. Somehow, one crisp November night, I got up the courage to go and check this option out. I found my way to the room and was by far the youngest person in the small crowd. And yet there was something reassuring about that; it felt safe to my scared and worried little heart.

So I came back, week after week. My soul thirsted for that community of prayer and my faith was watered, seeing other people healed (inside and out), and finding healing and joy and providential answers in my own life. I learned so much from this community.

It was my second chance and it was what I needed. I'll never know whether the boiler room would have provided the same sort of support or resting grounds for me. But that doesn't really matter, does it? What matters is that God still met me where I was, lonely and in need, and provided for me. Even when I gave up in fear, he did not relent. That is mercy and grace.

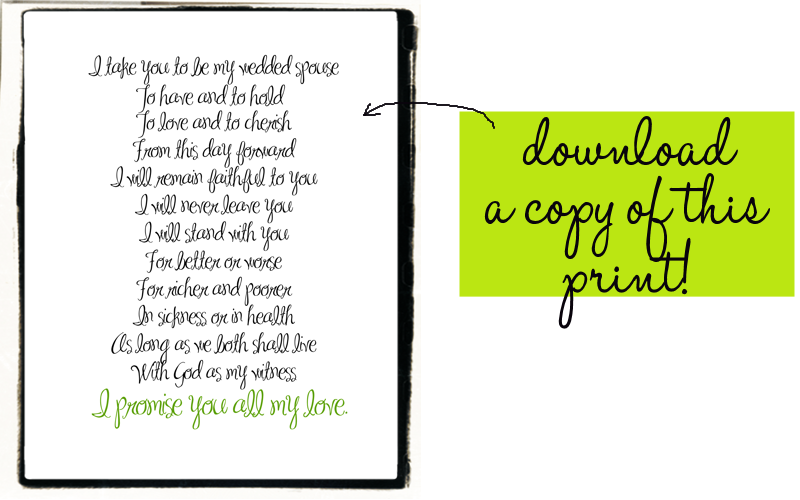
I know that my Redeemer lives,
and that in the end
he will stand upon the earth.

Job 19:25

Related Posts
Learning About God's Loyalty Firsthand
Why I Keep Looking Back and Reminding Myself at What God's Done
READ FULL POST >>

Pinned! Now on Pinterest, the Virtual Inspiration Board

Just a little head's up to those of you already on Pinterest: I joined about a week ago and have been pinning away ever since! You can see and follow any of my boards here.

If you're not familiar with Pinterest, basically it's a site where people save / post / show off all the cool stuff they discover online, whether it's clothing from shopping sites, yummy recipes, crafts to try or anything else that you want to file away for a rainy day.

I put off joining Pinterest for awhile. Mostly because I've tried a few of those sites before where you find cool stuff online and post them to the site, and they've never really "stuck" for me. But I think one of the strengths I've appreciated about Pinterest is that you can search other people's treasure troves, easily repin them and not have to worry about forgetting where you saw that one neat craft or what blog had such-and-such. If you pin it, it's all in one place. Easy peasy.

When I recently decided I wanted to get a clock for our bathroom, I went onto Pinterest, searched for "clock," and was able to flip through a bunch of really cute and crafty ideas to kickstart my inspiration.

So, I'm officially on the pinterest bandwagon. Come and join along!

Related Posts
Find Life Blessons on Twitter
{ photo }
READ FULL POST >>

Free Download: Wedding Vows Print Exclusive

It's no secret that I like to make my own artwork (exhibit A and exhibit B, for instance). In my recent showcase of my bedroom, there's another little piece of artwork that I whipped up, which hangs over my bed.

After my husband and I got married, I knew I wanted to frame a copy of our vows and keep them somewhere visible, as a constant reminder of what it means to us to be married. I finally got around to doing that about a year into our marriage and finally hung them when we moved in here!

All I did was whip up a document in Corel Paintshop Pro, downloaded a copy of the typeface Ma Sexy, and typed in the wording of our vows.

And just in case you aren't in the mood to make your own, I thought I'd offer a copy of my production here for anyone who's interested. You can download it (for free!) from this link.

Once it loads in your window, just right click and save the image onto your computer. Then just upload and print it. It's sized to be printed up as an 8x10 image, so you can print it at home or using whatever photo printing service you like to make it look a little nicer.

Feel free to download it and put it to use it in your home. If you do end up using it, I'd love to see a photo of the finished piece!

(And this should go without saying but please be kind and don't try to sell it or use it for anything other than personal use. Thanks for understanding!)

Related Posts
Tutorial for Making Your Own Travel Map Corkboard
Creating Framed Nest Artwork for My Living Room
READ FULL POST >>

Apartment Tour: The Bedroom

It's been a few weeks now that my husband and I have been living in our new apartment, and I wanted to share what we've done to turn it into a home, room by room. It isn't perfect, and I don't want to portray it as so. But it is real, and that's what I want to showcase—the beauties, blemishes and all. (I explained a little bit about that here.)

This week, I'm going to show you around our bedroom. Feel free to browse all the previous posts featuring the apartment tour here.


And here, my friends, we are at my bedroom, which is (and has always been) my favorite room to decorate. I imagine that it has something to do with the fact that it's here that I've found a combination of furniture and linens that all seem to match and make me smile.


Here's a more direct look at my bed, which is covered with a hand-me-down quilted coverlet and sits against a dark wood headboard that my dad and I made together a couple of years ago for my first grown-up (meaning, post-college) apartment. The photo on the right gives a better look at our bedside tables, which I would love to (someday!) add some nice legs to so that they have a bit more stature. Right now they look a little stunted beside our bed! I'd also like to get some wall lamps (like these) to aid bedtime reading, but let's not get ahead of ourselves...


Step back a bit and you can see one of our dressers, topped with a vintage-looking mirror. (Don't let it fool you though. It's really from Old Time Pottery.) To the left of the dresser (which you can't see in this photo) is a bookshelf that I'm using for my folded items. The door on the left will take you to our bathroom and laundry area, and the door on the right is our closet. I got one of those over-the-door hooks, as well.


Turn a bit more to your right and you can see our windows that look out into the backyard. We get a lot of sunlight through those, which I love! The teal-ish curtains were a pair I picked up for our previous apartment when we needed something thick to block the sunlight. These have a sort of velour texture, so they do a great job! You can also see this is where we have our ironing board set up and the travel corkboard map that I made!


(Please excuse the funky photo editing. Definitely not my forte!) Beyond that is our set of IKEA bookshelves that hold our (slightly) staggering collection of books. It's also where my husband stores his guitar. That big grated box is our space heater (there's another in our kitchen), and beside that (which you can just barely see in this picture) is a tower of boxes that we have yet to find space for!


Here's a little montage of some various photos, including another look at the bookshelves, where I've decided to stow some of my colored glassware and ceramics. Here's another look at the travel map and some fake polaroid pictures I taped up with colored masking tape.

Be on the lookout later this week for a fun little download, courtesy of this room! Any guesses what it might be? Go here to see!

Related Posts
Apartment Tour: The Kitchen
Apartment Tour: The Office
Apartment Tour: The Living Room
READ FULL POST >>

How My Garden is Growing After A Month

Curious about how my container garden has been going?

I'm definitely no green thumb, but fortunately, my plants seem to be showing progress thus far. It's been about 3 weeks since I planted my garden with lettuce, spinach, carrot, cucumber and bean seeds. (If you missed the post with step-by-step instructions on starting a container garden, catch up here.)

Since then, I've been documenting the growth of the various crops every couple of days.

It will still be a few more weeks before any will be able to harvest for food. In the meantime, here's a look at how my garden has been growing, crop by crop over the course of these first few days:


(I forgot to take a picture of the carrots on Day 6. Oops!)


(The spinach is the most lackluster of the crops, so far. I'm not sure why it's so spindly and sparse. I decided to plant a few more seeds in the empty places in hopes that we'll get a decent yield eventually!)

Related Posts
Starting a Container Vegetable Garden
READ FULL POST >>

The Art of Adoration


Last weekend, my husband and I stopped by a prayer meeting that was going on at our church. At one point, we went around in a circle and prayed through the different elements of ACTS praying: Adoration, Confession, Thanksgiving, Supplication.

When we got in the car, my husband said, "Isn't it funny how when we're supposed to be adoring God, we just end up thanking him for who he is?"

My mind rewound to the prayer meeting: During the session of "Adoration," we took turns praying things like, "Thank you, God, for your goodness," (or "your love," or "your immutability," etc.).

"That stuff belongs under thanksgiving not adoration," my husband continued. "It's not like I say, 'Thank you for being pretty,' or 'Thank you for being so nice.' No, I tell you that you are pretty or nice."

It stunned me a bit how true it was. Even moreso because I had never really thought twice about it.

It got me thinking. If God were really a person and we were really having a conversation, how would I compliment him? What would I tell him I love about him, without feeling like I need to thank him for it, just telling him that I love these certain aspects about him?

You are strong and you keep me safe when I am scared.
You are handsome and dashing and such a gentleman. Such a bridegroom.
You are compassionate, in the way that you deal so gently with me, even though I don't deserve it.

And it was like that unlocked something in my time of prayer.

I thought about how much it means when my husband compliments me and affirms me in areas that matter to me. I realized, for perhaps the first time, what it must mean to God to hear his people gush to him about his attributes, his character, in a way that is pure flattery, pure appreciation, pure relationship.

I am learning, ever so slowly, what it means to adore Him...

Related Posts
A Prayer for Love 
A Prayer for Joy
READ FULL POST >>

What Do You Want to Read in Future Blog Post Series?


Now that I've had the chance to get my feet wet with a couple of blog series (including the Testimonies series about God at work in the lives of different bloggers, the Your Questions Answered series, as well as the current Apartment Tour series), I must say that I have become quite a fan of ongoing blog series.

For one thing, they've allowed me the chance to delve deeply into a given subject over a series of weeks, they've allowed me to open the floor up to readers and fellow bloggers, plus they've also helped me channel my blog writing and spark inspiration to keep content flowing.

With that in mind, I wanted to see if any of you had suggestions about what sorts of series I should tackle in the future? I've been kicking around a couple of ideas for future blog series, including one about some of my favorite things around the house (now that we're almost done with the Apartment Tour!) and another about some of the lessons I've learned in these newlywed years, as my husband and I inch closer to our 2-year anniversary this summer.

Do either of those ideas sound like something you'd be interested in reading about? What other topics or themes would you like to see addressed as a series on Life Blessons? Please share your thoughts and suggestions in the comments below, or feel free to shoot me an email.

Thanks for your insights!

Related Posts
Why I Blog
{ photo } 
READ FULL POST >>

Apartment Tour: The Kitchen

It's been a few weeks now that my husband and I have been living in our new apartment, and I wanted to share what we've done to turn it into a home, room by room. It isn't perfect, and I don't want to portray it as so. But it is real, and that's what I want to showcase—the beauties, blemishes and all. (I explained a little bit about that here.)

This week, I'm going to show you around our kitchen. Feel free to browse all the previous posts featuring the apartment tour here.

This, my friends, is our kitchen. Honestly, it's not my favorite room in the house. (You'll see that next week!) But, it works for what we need, so I'm trying to appreciate it for what it is! That big tan box to the left of the stove is our space heater, and there's another one in our bedroom. I have no clue how efficiently they heat up the place, but fortunately we have a few more months before we have to test that out.

Here's a closer look at the stove and fridge area. As you can see, I've moved my homemade chalkboard from the office into the kitchen, where I think I like it better. I also nailed some alligator clips to either side, where I can easily swap out different pictures from magazines or wherever. On the side of the stove, I used some of those "power lock" suction cups to keep my hot pads at hand for easy cooking accessibility. On top of the fridge, I've corralled all my cookbooks in a basket.

Our cabinets run most of the length of one side of the room, which has been lovely in giving everything a proper place. I ended up storing all of our food items in those bottom shelves, and it makes me feel like I'm at a grocery store instead of my pantry shelves. (You can also see the fruits of my handwashing here on display!)

Here's a closer-up photo of the countertop, where you can see: the fruit wallpaper (not my style, but way better than the wood paneling it's covering up); our mini-microwave, which also serves as where I stow all my recipes; plus a cute little owl cutting board and cheese knife that one of my dear friends got me a couple years ago!

At the other end of the room is a (really dark*) little nook where our dining room table is nestled quite perfectly, with our four chairs that I recently recovered fitting around it without a hitch.
(* It really doesn't look quite that dark, but my old point-and-shoot is not too fond of low lights. The photo below is a better representation, but at least from this one you get a general feel for how the room fits together.)

Here's a closer-up look at the table, chairs and curtains. The table itself is also a dark wood, so we have opted to keep it covered with table cloths so that the corner doesn't feel drenched in darkness. That has been something we've had to work at avoiding, thanks to all the wood paneling in here. I also added some big white curtains to try to lighten that corner up a bit.

Related Posts
Apartment Tour: The Living Room

Apartment Tour: The Office
READ FULL POST >>

Starting a Container Vegetable Garden

I briefly mentioned a couple of weeks ago, that I was in the process of gathering supplies to kickstart my veggie garden, now that I finally have room for one.

Well, it's now officially planted and, sure enough, the seeds are sprouting up. So far, so good!

I figured that before I showcase the fruits (ahem) of my labor, it might be best to give a little introduction to my DIY-style of container gardening, in case anyone else is tempted to start their own.
Getting Started
The first thing I would recommend is to do your research. I started by buying a dirt-cheap copy of Container Gardening for Dummies and reading through it. This was a great resource because it helped me determine what kind of soil and fertilizer to buy, when to plant my seeds, as well as what varieties of seeds to choose. (It included a helpful list of container-friendly buzzwords to look for on seed packets like "compact" or "small" that really helped me make my seed choices.)

Selecting a Container

Probably one of the biggest factors that matters is selecting a container--namely, making sure it's big enough for the seeds you've selected. A good rule of thumb is that it should be at least a cubic foot in size. I knew I wanted to plant mine in buckets with handles that I can move around the yard, if need be.

To that end, I got a hold of some empty kitty-litter buckets and then drilled a dozen or so holes (using the largest drill bit I had) in the bottom of the bucket for drainage. One of the perks about this solution is that it was absolutely free and the buckets come with lids, which allowed me to cover the buckets up when a huge downpour hit and I wanted to protect the seedlings from the elements.


Gathering Your Planting Supplies
The other necessities you'll need include:

Soil: I chose to go with an organic general soil mix, and added some seed-starter soil as a thin top layer

Fertilizer: I chose a slow-release organic version, which I mixed into the soil

Seeds: From the Container Gardening for Dummies book, I copied down some of the varieties of veggies that they recommended as well as their list of keywords. Then when I browsed the offerings at the garden shop, I ended up picking varieties of lettuce, spinach, carrots, cucumbers and green beans that I think will work well for my containers.


Now, Get Planting!
At this point, it's time to plant. I watched the weather and tried to pick a day that would give my seeds a couple days of sunshine before any predicted rain. I'm not sure if this matters or not, but I figured it couldn't hurt.

I sat out on my back steps and shoveled handfuls of soil into each container, making sure to mix in some fertilizer about halfway, so that it's well interspersed. I also watered mid-way, to get the soil nice and moist for the seeds.

I added about a foot or so of soil before sprinkling on a layer of the seed-starter soil, a few seeds (my packets came with enough seeds to plant what looks like an entire field!), and a top layer of the seed-starter soil.

The packets should have directions about how far apart to plant your seeds as well as how much soil to add over top. I didn't measure the depth, but just guesstimated. (Everything has sprouted, so I don't think it has to be perfect!)

Once each container is planted, give it a good watering that will soak the soil. Find a good place in the sun and let your plants bask in the glow.


Now it's time to get ready to practice patience while you wait for them to sprout! I'll keep you updated once there's more growth to showcase. They're looking good so far, so we'll see how they fare over the long-term. I hope to get at least a salad out of all this hard work.

Related Posts 
Garden Daydreams
An Introduction to Canning and Preserving
{ photo }
READ FULL POST >>
Next Post Previous Post
Related Posts Plugin for WordPress, Blogger...