


I'm a fan of simple meals. The kind that include simple ingredients that I have on hand and come with effortless instructions. The kind that can be served up in a pinch without a ton of preparation. The kind that don't leave my kitchen in a mess and sink full of dishes. The kind that you can't believe it tastes so good with so little work.
This is one of my favorite go-to dishes because it could not be any simpler.
I came up with it one night when my husband wasn't home and I wanted to use up some leftovers that we had: a little bit of rice, some broken tortilla chips in the bottom of the bag. I layered them in a dish along with some refried beans, corn and salsa, and baked them in the oven for fifteen minutes or so.
And I was pleasantly surprised with how well the casserole turned out, being thrown together on a whim. A couple days later, I served it to my husband—when dinner was already running late—and he became an instant fan of the dish as well, despite the fact that it is such an easy combo.
Want to see how easy it is to throw together? Here are step-by-step photos I took while I made it the other night. (Read on for the full recipe.)


See? So super simple.
The great thing about this dish is that it's an incredibly forgiving recipe that you can customize to your heart's desire with whatever you have on hand. So feel free to use the recipe below as a template or follow it to the letter. Either way, you really can't go wrong. Start experimenting and see where it leads you...
- Preheat oven to 350 degrees.
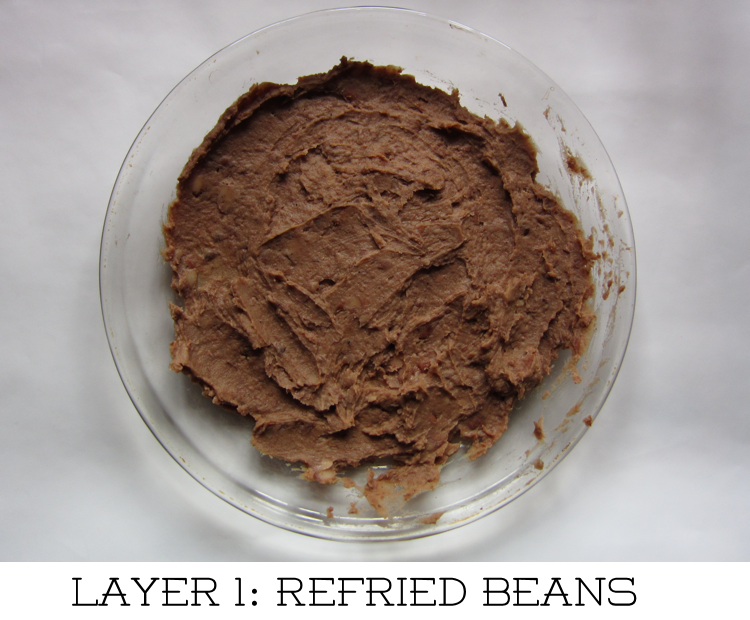
- Using a 9-inch pie plate or an 8x8 baking dish, spread 1 to 1½ cups of refried beans on the bottom in an even layer.
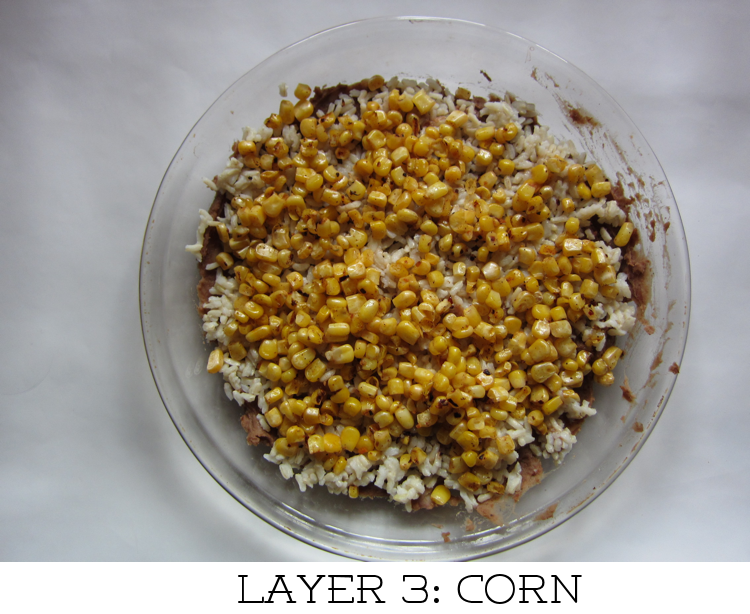
- Next, spread 1 cup of brown rice (that has already been cooked) in an even layer.
- Add 1 cup of corn. (You can use fresh, frozen or canned corn that has been drained. I like to heat up a skillet first and saute the corn a little with some chipotle spices so that the edges get browned and there's some extra flavor to them.)
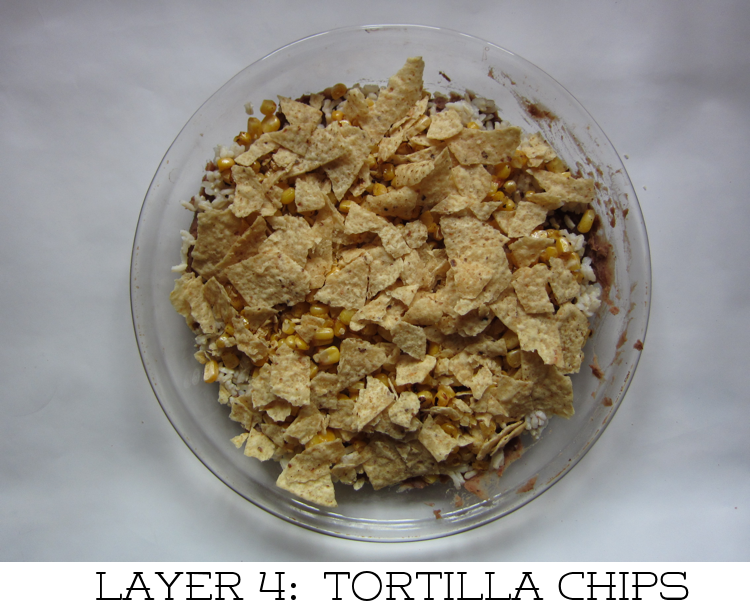
- Add 2 to 3 handfuls of tortilla chips that have been broken into pieces. (This is a great way to use up the extra pieces at the bottom of the bag, even if they've started to go a little stale. Once it's baked, you won't be able to tell at all! Also, I prefer to put the salsa on top of the chips, because when you bake it, the salsa will help the chips soften. However, if you want the chips to be crispy, you can put them on last. Totally personal preference.)
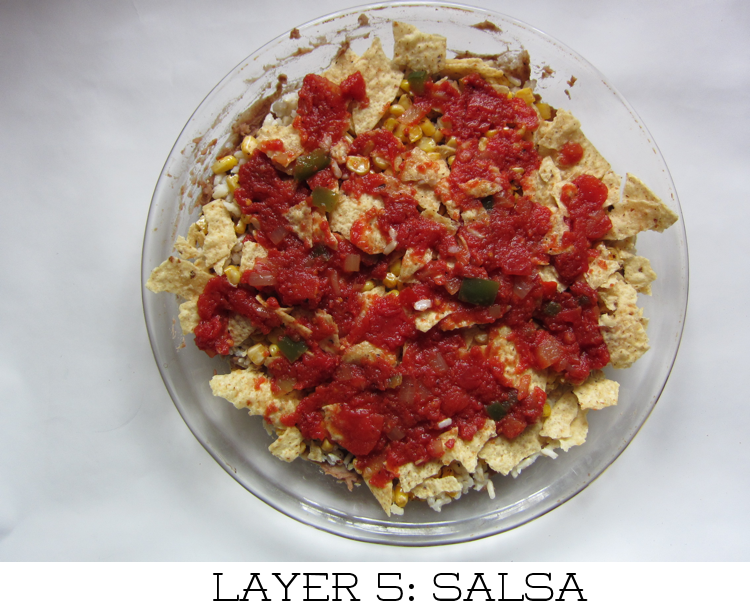
- Add ½ cup to 1 cup of salsa in an even layer. (Click here for my recipe about how to make your own salsa.)
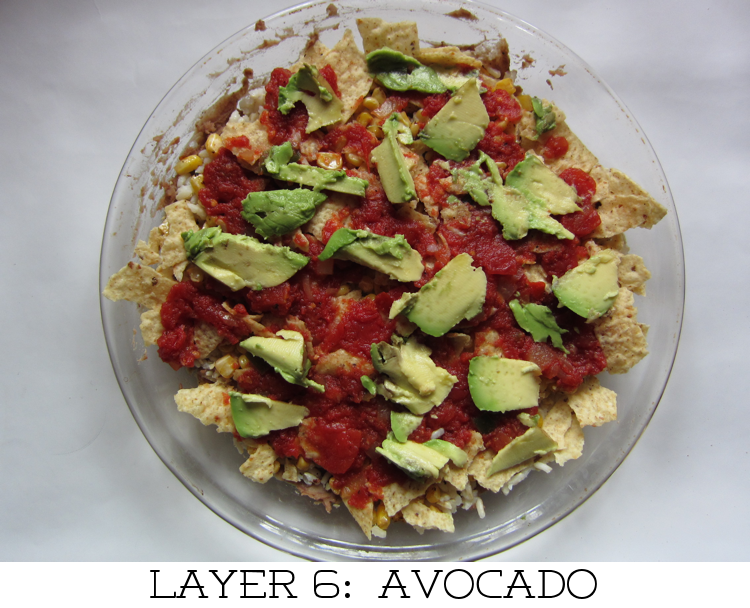
- If you have some avocado on hand, chop up ¼ to ½ of an avocado and sprinkle sections on top.
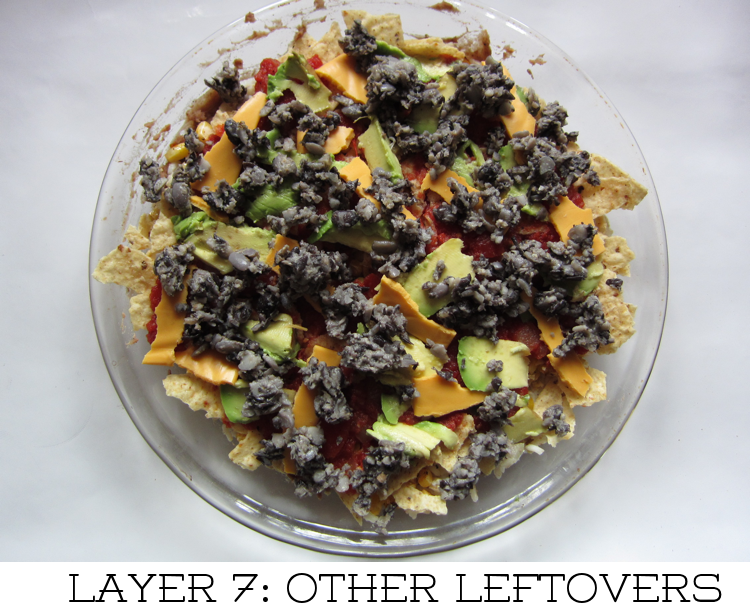
- Raid your fridge for other leftovers that you can add in. I had a single slice of cheddar cheese that I tore into sections and added in. I also had one black-bean burger patty that I crumbled over top. You can consider other things like olives, peppers, onions, shredded cheese, sour cream, guacamole, etc.
- Pop it into the oven for 15 to 20 minutes, so that the entire casserole is thoroughly heated.
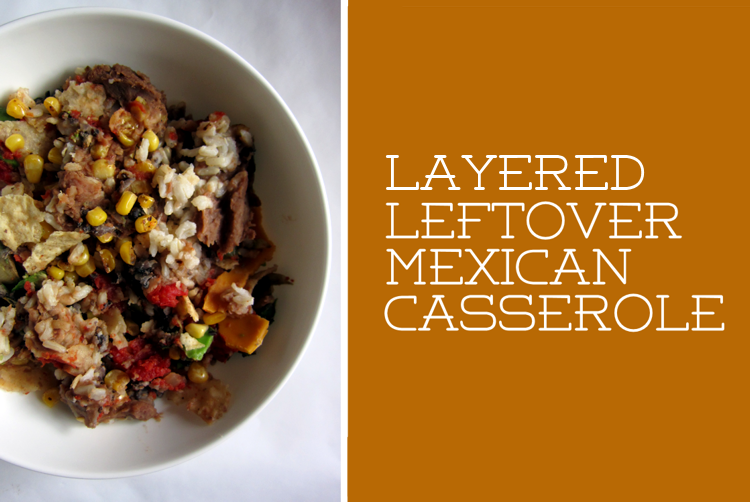
- Remove from oven, spoon into bowls, and serve!
Related Posts
Homemade Black Bean Burgers Recipe
Cooking with Dried Beans
Make Your Own Tomato Salsa Recipe


Hey Carmen- love your blog. Do you cook the rice before you put this in the oven?
ReplyDeleteYes, Jessica, the rice I use in this has already been cooked. (Usually I use leftovers from a previous night's dinner.) My apologies for not making that clear; I'm going to update the post to reflect that. Thanks for pointing that out!
ReplyDeleteI started making this last night, and our power went out. So I finished it today. it is currently in the oven, and I think it will be great! Thanks for sharing!
ReplyDelete