

I’m so excited to kick off this new series, Make the Most of Your Wardrobe, with one of my standby alteration techniques!
There are so many times when I’ve come across a shirt that fits me in so many ways—the perfect color, a good price and not too tight or too baggy—but is too low-cut for my tastes. That can be such a bummer. But fortunately, it doesn’t have to be.
If everything else about the shirt is right but the neckline dips too low, usually fixing it is as simple as a single stitch.
I’ve used this alteration technique multiple times and, in doing so, taken a shirt that would have otherwise been condemned to the back of my closet or to a life of layering and given it a second chance in my wardrobe.
Let me show you how you can do it, too.
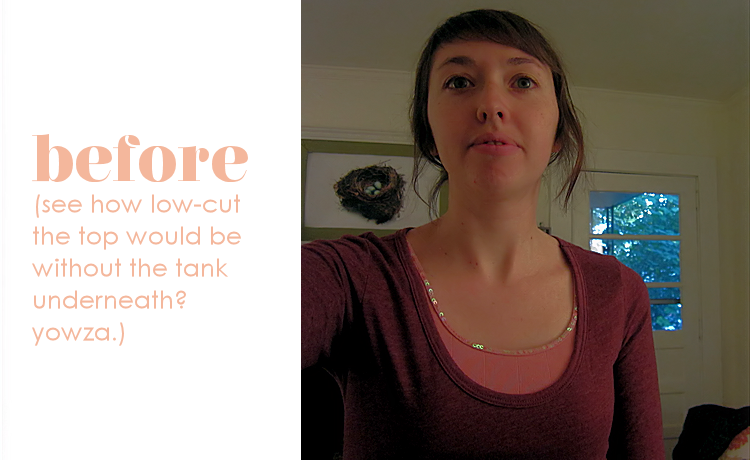
First up, the prerequisite before shot of the shirt I’ll be using for this sewing tutorial:

1. Using a top that is lower-cut than you’d like, turn it inside out and lay it on a flat surface. Hold it at the top of the shoulder seams and smooth it out flat. Place a pin along the neckline near each shoulder seam so that they stay lined up.
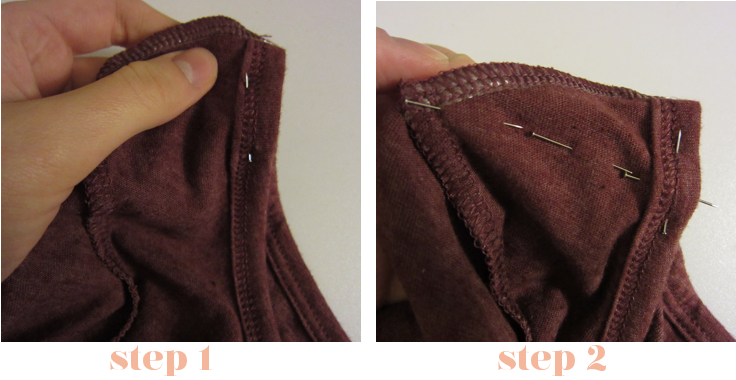
2. Next, you’ll want to pin a straight line from the corner of the shoulder seam to the neckline. The farther (or deeper) down the neckline you take this line, the more material you’ll be removing and the higher up you’ll be pulling the neckline. So if the neckline is only a smidge lower than you want, this line should only go a short ways down the neckline. I wanted to take off about an inch and a half, so mine is deeper.
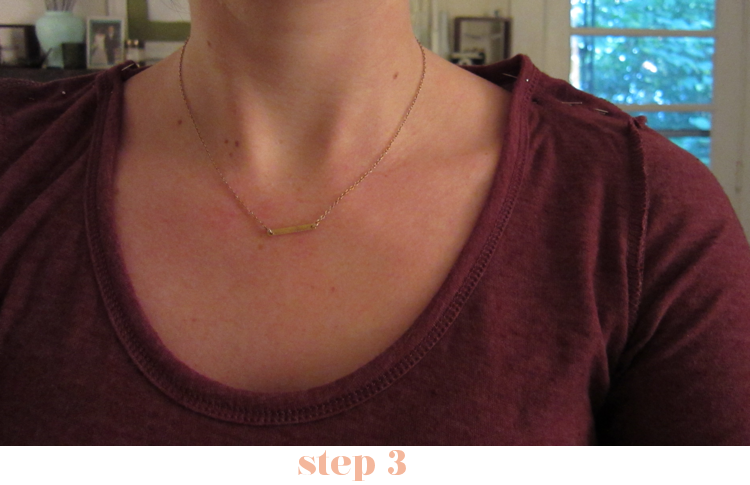
3. Once you have your pins in place, I’d recommend trying the shirt on (keeping it inside out) and being careful not to prick yourself. Once it’s on, make sure that you’ve placed the pins properly and that the neckline falls where you want. (I put a necklace on to help me judge where I wanted the new neckline to fall.) If necessary, unpin and repeat steps 1 & 2. It’s better to take the time and get it looking right now rather than once you’ve already sewn it in place!
4. Now it’s time to sew. You’ll be sewing along the line that runs from the neckline to the shoulder seam (keeping the shirt turned inside-out), and I’d recommend starting at the neckline. I just used a standard straight stitch and you can see the settings I used on my sewing machine in this photo:
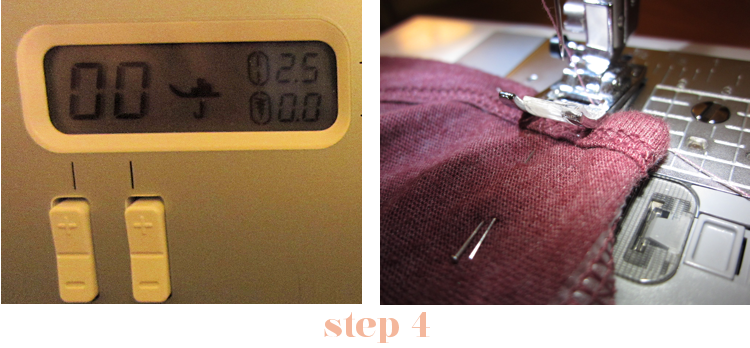
Depending on the type of fabric you’re using, you might need to adjust your tension and length settings accordingly.
(By the way, here’s a newer version of the sewing machine I have. It’s computerized so it makes everything so much easier!)
5. Once you’ve finished stitching the line from seam to seam, you can clip the thread and remove the pins. Your shirt should look like this:
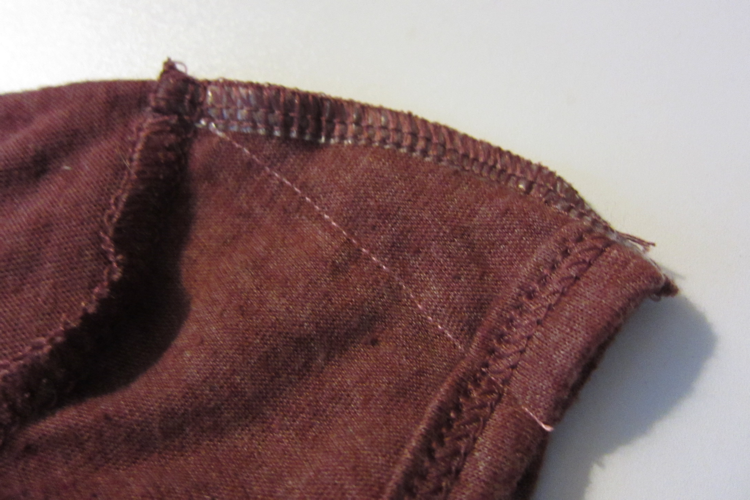
Now, flip the shirt right-side-out and try it on, to make sure you’ve sewn it correctly and it fits how you want. (If you have made a mistake, you can use a seam-ripper to carefully remove the stitches and start over. It might take a little while, but it’s doable!)
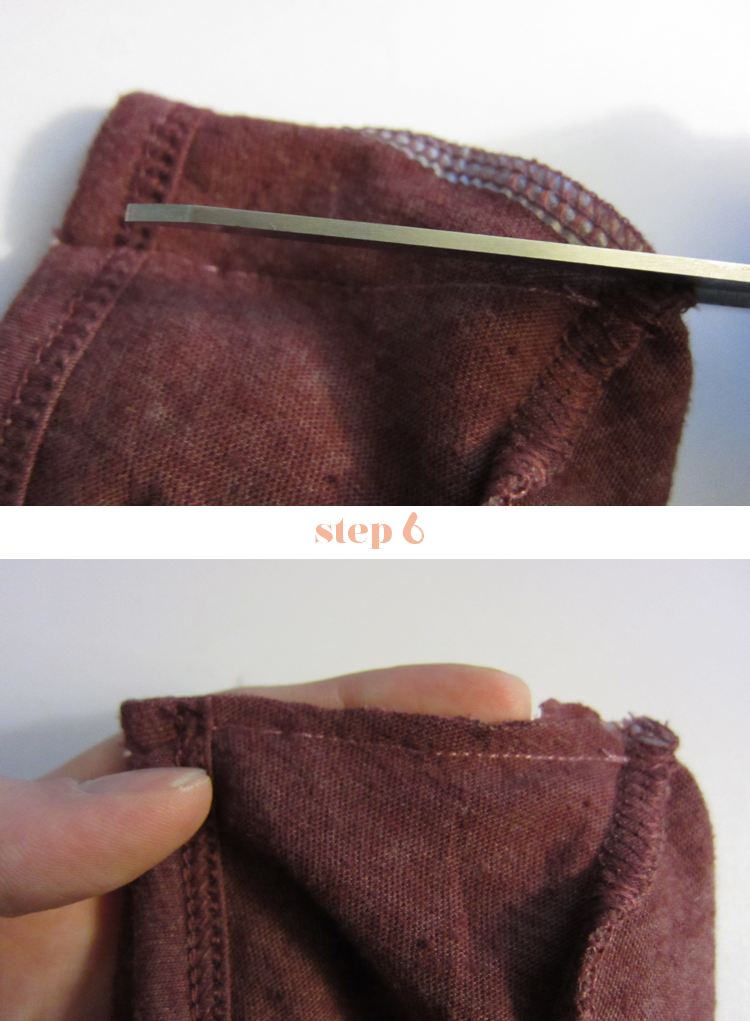
6. Once you’re happy with the stitches, take a pair of scissors and cut off the excess fabric. Make sure that you cut off the material above the stitch you just made, like this:
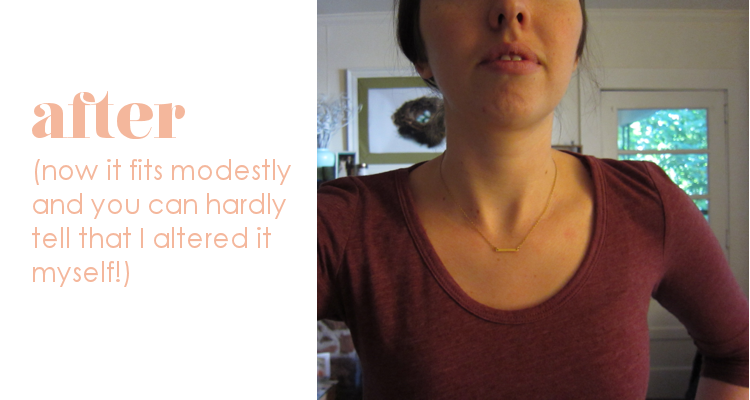
7. Now, try it on again and admire the handiwork of your new top that now fits you more appropriately! Here’s how mine looks now:
And really, the only place where the alteration is noticeable is at the shoulder seam where there’s a slight tuck, which you can see here:

But that’s not really a big deal to me and is worth it to have a top that I don’t have to layer over tank tops just to be able to wear out in public!
P.S. If you like this tutorial, please click here to pin it to Pinterest! You can also follow me on Pinterest here.

I've got a sewing itch that needs scratching...
Shopping My Closet for Crafts


That is so awesome! Man, you're so crafty, Carmen! haha
ReplyDeleteAh, thanks! I have just learned I have to be resourceful when it comes to finding clothes that fit me right!
ReplyDeleteclever idea. love it! :~) Thank for sharing it with us, I have a few shirts that could benefit from this alteration, and in the summer not wearing another layer is certainly appreciated.
ReplyDeleteGreat idea. I wonder if you met the seam a couple of stitches earlier and then sewed straight on to the seam for the last couple of stitches if the pucker wouldn't be there? (similar technique for putting in darts without a pucker)
ReplyDeleteI came over from MSM and had fun exploring your blog. Thanks for the pants tip.
So glad you popped over to visit and have enjoyed it! I can't quite envision what you're explaining, but I'm wholly self-taught on the sewing machine so that's probably why. :) I'm still learning! If you try it and it does fix the pucker, please let me know!
Deletewhen you are sewing your new seam, if you can keep a straight seam and meet up with the original seam just about 1/4" or so before where it meets the sleeve, it shouldn't pucker. also, there would be less puckering if you are making a smaller seam (taking the shirt up just a little at the shoulders instead of a lot). but fpr being wholly self-taught, i'd say you're doing quite well!
ReplyDeleteThank you so much. That was the answer I've been searching for. I still have to perfect this method. But hey, I'm doing it by hand :)
ReplyDeleteOkay... now I'm going to have to get ALL the shirts out of my closet that I have to wear over a tank top and get sewing =) Thank you so much for this tutorial!!
ReplyDeleteThanks so much for this tutorial. I am so tired of having to wear tank tops under everything because they are too low. This will eliminate the problem. Many thanks!
ReplyDeleteThank you so much for this idea! I've been blessed with a rather large bust, and have to wear plus-sizes because of it. The problem with plus-sized shirts, and even dresses, is that the necklines are friggin' HUGE! It's like the clothing manufacturers think our heads are that big or something. No, really, it's probably just so they can use as little fabric as possible and cut costs. But anyway, this will help tremendously - especially with maternity clothing - where the necklines are even bigger!!!
ReplyDeleteThank you so much! I love this and I have one question,
ReplyDeletedoes not the shirt get shorter at the bottom?
Hmm...gotta try it soon :)
I followed these steps and the shoulders puckered very, very badly. Any idea on how to fix them?
ReplyDeleteWow, awesome! I love this series!
ReplyDelete