

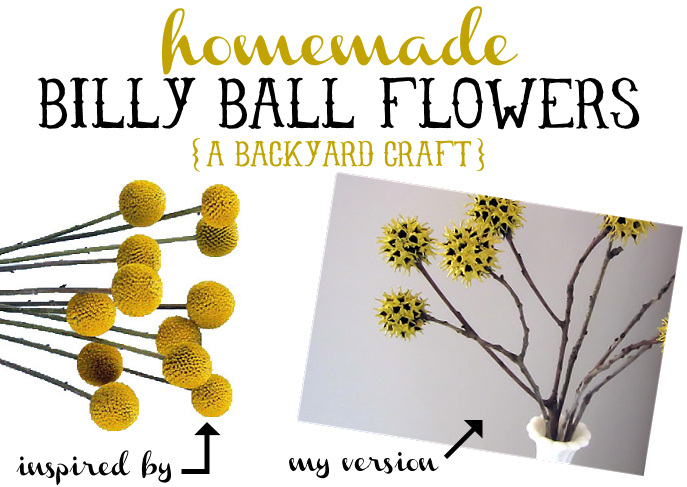
Billy ball flowers. You may not know that’s what they’re called, but if you’ve seen almost any decorating blog or magazine, you’ve probably noticed them. They’re those little yellow, ball-like flowers that festoon nearly every fashionable abode this side of the Atlantic. (The more scientific moniker for them is Craspedia.)
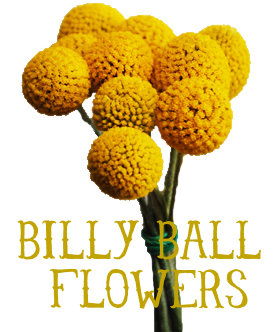
This is what they look like, naturally >>>
I admit that I’ve jumped on the Billy bandwagon as well, but of course, only by giving it my own spin.
When I was doing some decorating in our newly painted bedroom, I had a couple of extra, matching milk-glass vases that didn’t fit our living room mantle, where the rest of the collection is housed. So I decided to perch them in here. At first I fitted them with candles but decided that made it feel like a candelabra in some medieval parlor somewhere.
No, I wanted some flowers and the Billy ball variety seemed like a perfect fit.
Since I spend a chunk of the day without a car (click here to read more about why we only own one car), I decided to see if I could make my own version without having to leave home and scour the fake-flower department at Hobby Lobby. I considered it an exercise in resourcefulness and creativity.
So it was.
As I pondered the idea, I remembered all the prickly seed pods that littered our yard. I did some research and they’re from the sweet gum tree which is prevalent all over the south. (When I lived in Ohio, I don’t remember seeing the pods as often. But they’re everywhere down here.)
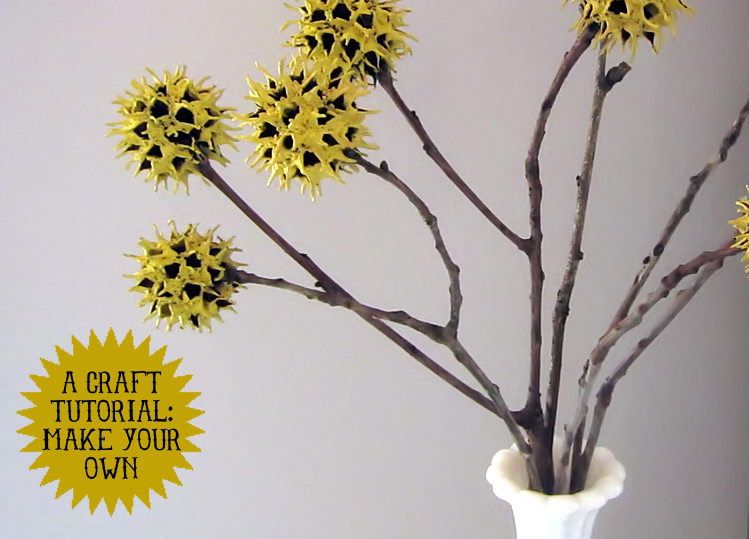
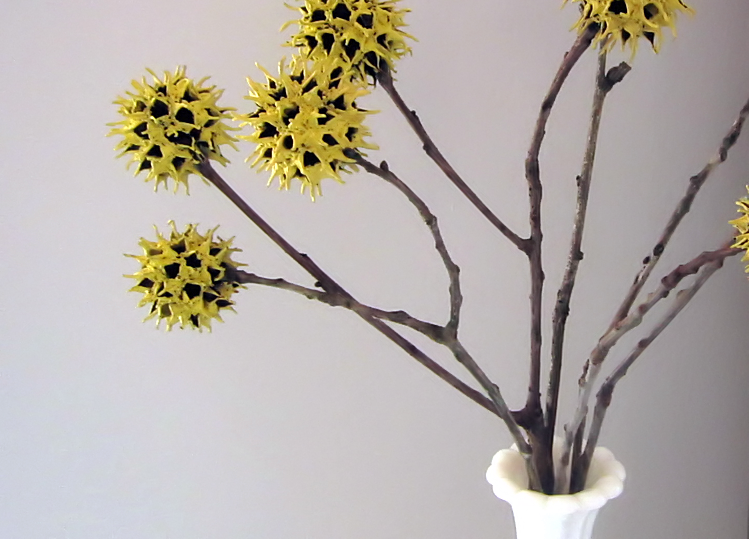
On my walk exploring our yard, I picked up a couple dozen and then went to work, turning them into my own Billy balls for a decidedly homegrown arrangement with just a little bit of paint, glue and patience.
Within a day or two, I had a bouquet that I clustered into the vases and proudly showed off on our bedroom dresser:
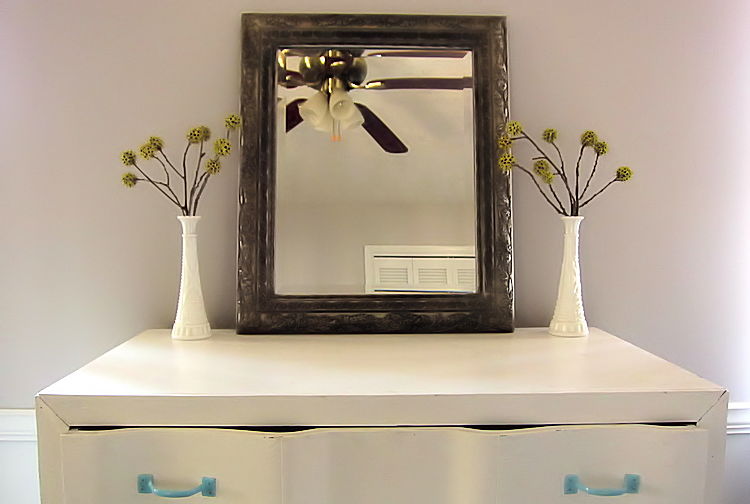
(You can see some pictures of our redecorated master bedroom here.)
And, for the curious, here’s how I made them:


1. Gather about two dozen dried sweet gum seed pods that still have a stem on them. Alternatively, if you live somewhere without these, you can try using any other round-shaped object. I’ve seen other tutorials that make use of small Styrofoam balls or felted yarn. Use your imagination!
2. While you’re outside, also gather about two dozen small sticks. Pick a variety of straight ones and some with forked branches or curves to them.
3. Paint each pod with a mustard yellow color, holding on to the stem so that you can get all the angles. (I used regular wall paint because that’s what I had on hand, but you can always try spraypaint or craft paint and see how those work.) Let the painted pods dry for a few hours, until they’re dry to the touch.
4. Once the paint has dried, use some scissors to cut the stem off the pod.
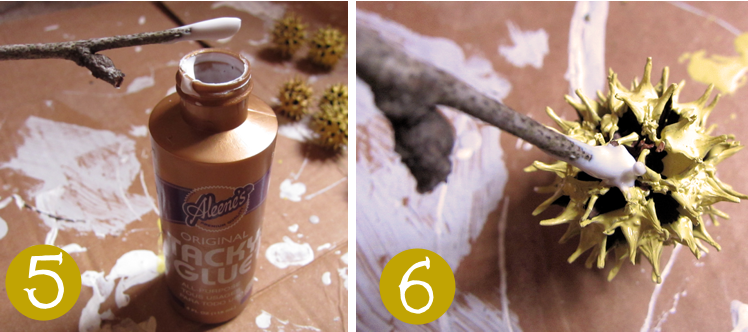
5. Using a sturdy craft glue like Aleene’s tacky glue, dip the tip of one stick into the glue until there’s a good-sized glop on it.
6. Locate where the stem originally was or a spot on the pod where you weren’t able to get fully covered by paint. Push the stick into this crevice, and lay on a flat surface propped up so that it dries in place. Let the stick-and-pod dry overnight.
7. In the morning, they should be completely dry and ready to be arranged in a vase of your choosing. Enjoy!
P.S. If you like this tutorial, please click here to pin it to Pinterest! You can also follow me on Pinterest here.
Related Posts
The Beauty Within My Own Backyard
Making My Own Artwork: My Travel Map Craft Project


Finally! A use for those annoying "prickery" things! :)
ReplyDeleteI like your version much better than the original!
ReplyDeleteThose are really cute! We had gumballs all over our backyard when I was a kid in Virginia...they were those pesky little things that made it quite difficult to play barefoot in the backyard! So I may have to give this little craft a try, I love anything that uses free stuff from outside!
ReplyDeleteJackie, I know! They litter my yard it seems a waste not to find someway to put them to good use!
ReplyDeleteThat's so sweet, Louise! I appreciate it!
Oh my gosh, I just raked up a bunch of those things, I'm gonna go fish them out!
ReplyDeleteThat is so cute! I was actually just thinking the other day that spray-painted sweet gum seed pods (I always called them cherry bombs) would make a great apothecary jar filler. You are so creative to turn them into billy ball flowers tho!
ReplyDelete~em at small girl, big world